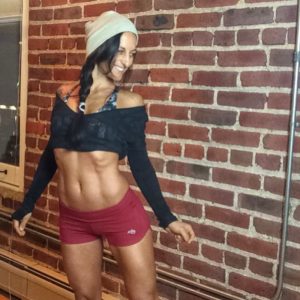
Quantcast
Channel: Workouts Archives - The Betty Rocker
Viewing all 363 articles
Browse latest View live

8 Amazing Ab Exercises

$
0
0

Photo Jul 30, 9 56 35 PMThere’s really nothing sexier than a flat, toned stomach, but…

…there is no point in having abs that look great and don’t actually function at their job of stabilizing us in all the movements we do. Back pain is definitely NOT sexy, but training your core wrong can actually set you up to hurt your back.

Most people just think of their “core” as their stomach muscles, but it’s actually made up of an entire band of muscle that wraps around your body above your hips – not just your stomach but your lower back as well.

Our abdominal muscles work together as a unit to support, stabilize and move us around. While most muscle groups have one primary and one secondary nerve, the abdominal wall is enervated by 8! 

That’s because the core muscles have so many important jobs to do, and they work to stabilize our spine, support the movements we do with our legs, arms and trunks, protect our organs and basically never stop working for us as we go through our day.

Doing too many exercises that target the rectus abdominus, or the muscles that run down the center of our stomach (like crunches) combined with the habitual pattern of sitting at a desk all day or driving sets us up for badly imbalanced and dysfunctional cores that can’t protect us. 

abdominal-muscles-anatomy-1024x585There are a few key players in your core.

There are the external and internal obliques, that help support us as we twist and bend – and also support our ribs as we breathe in and out. You’ve got the transverse abdominus that are one of the most important trunk and lower back stabilizers. Your rectus abdominus is also an important stabilizer of your trunk – but it works together with the other layers of muscle, not alone. You’ve also got deep core stabilizers, your primary hip flexors – the psoas muscles. They support and stabilize your lower spine along with the lower back muscles, the quadratus lumborum. 

I could care less if I have a “6-pack” I’d rather have a strong, tight stomach and a fully functional BALANCED core that allows me to move in every direction and enjoy all of the activities I love.

You don’t need to know every function and every muscle in your core, but you do need to know that activating it with dynamic movements that target its many different jobs will not only protect you from injury and give you greater stability in all of your activities – training it properly, all of it – will actually give you that extremely sexy and lean look you’re after. With the added bonus of supporting you functionally.

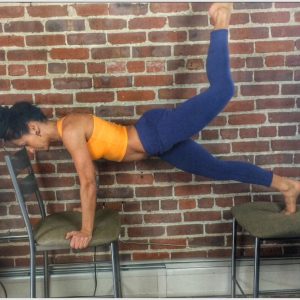
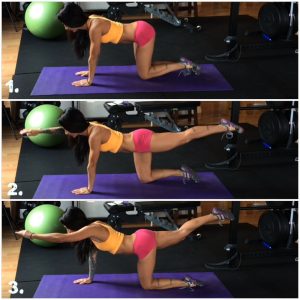
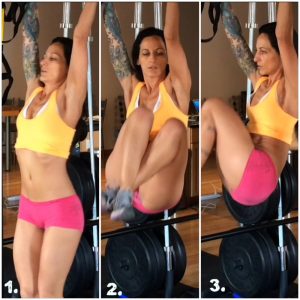
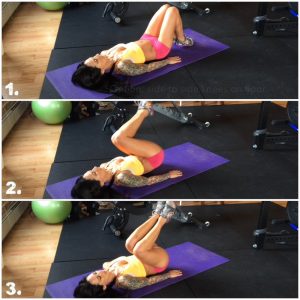
Check out today’s 8 dynamic ab exercises, and work on performing them with good form so you can train your body to look sexier AND move efficiently and support you in every way!
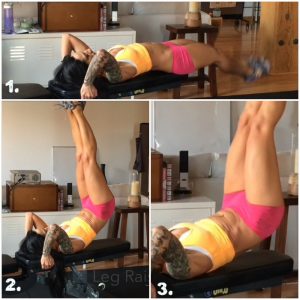
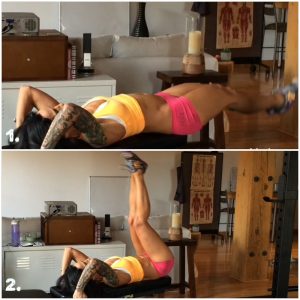
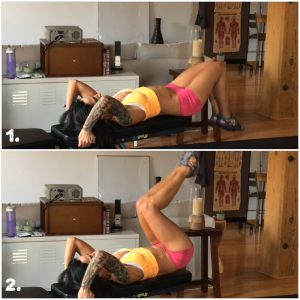
8 Best Ab Exercises

Format: 3 rounds

1: 10-30 second hold L-Sits:

  • This is a phenomenal move that warms up your core, fires up your shoulders and is supposed to be challenging! 
  • You can hold it for a few seconds and work your way up to longer. 
  • Be careful if you’re using chairs, just make sure they’re stable. 
  • Press yourself up, keeping your shoulders back and slightly engaged, pressing evenly through your palms. 
  • Hinge at your hips as you bring your legs straight out in front of you and hold them there. If this feels weird, try standing up straight and hinging forward from your hips to come into a halfway forward fold. This is the exact position you’ll be in – except your legs won’t be touching the ground. 
  • This movement requires major core strength. You should definitely try L-sits on the ground (below) to build strength in your lower core.
  • Modify this move by sitting on the floor with your legs straight out in front of you. Put your hands by your sides, keep your chest open and try to lift your hips and feet off the floor. It can be helpful to make soft fists to give yourself a little more height. Hold it for as long as you can (don’t forget to breathe).

2. 10 Straight Leg Raises (or knee raises)

  • Hold yourself up on 2 chair backs or wherever you have access to 2 points that allow you to lift yourself off the ground and maintain a direct line from your shoulders to your wrists.
  • Straighten your legs and smoothly lower and lift them to 90 degrees. Depending on your height and the height of the chairs, you may need to bend your knees when you come down so your feet don’t hit the floor.
  • This movement is initiated in your core, but it will be tempting to push your butt back and use other muscles to bring your legs up.
  • Keep your back nice and straight and try to keep your hips from moving.
  • You can (and should) try a few with your knees bent first.
  • Modify this move by laying on your back, and pressing your lower back into the ground. Raise your legs up straight and lower with control. Keep your lower back glued to the ground throughout this exercise. You can also bend your knees if you’re having any trouble keeping your back pressed down.

3. 10 Tuck Jumps

  • What the tuck jump? This move is like a jump squat, but the driving force is to bring your knees up to your chest. I use my hands as a guide and try to get mine up as high as my waist.
  • Land softly as you come down, and use your arms to propel you into your jump. Be mindful of your knees, they should track in line with your toes as you come down and not go over them.
  • Modify this by working on body squats or on jump squats. Squatting down lower will give you more momentum to jump, and you can work on getting your knees up each time.

4. 20 Crab Walks

  • Come into reverse tabletop, lifting your chest and hips.
  • Press through your triceps and lift your left foot to meet your right hand.
  • Drop back down, being mindful of your hand placement – keep your wrists in line with your shoulders – and reach again with opposite hand and foot.
  • Each time you come down, dip slightly with your triceps. Keep your hips lifting and don’t rush these. 
  • If you’re having any trouble with your shoulders, or it’s tough to balance as you reach, take the reach out and work on lifting alternating legs up high.

5. 20 Alternating Front Kicks to Cross-Cross Punch

  • A simple and highly effective full core workout combination exercise – that also gets your heart rate up!
  • Begin with a few bounces, get used to being light on your feet. Kick as high as you can comfortably (imagine you’re kicking a door shut), allowing your stationary leg to support you, bending at the knee slightly. The kicking foot is flexed – lead with the heel. 
  • Kick on both sides, then I like to add a little bounce to set my feet slightly staggered which supports me as I  throw two strong cross punches.
  • Allow your core to really rotate as you cross punch, feel those deep internal and external obliques working to support you with this move. 
  • Don’t kick as high as me if this is tough at all – and try starting with throwing two knees, then two punches. 

6. 18 Squat Thrust Twist 

  • This move is so fun and so good – you’re combining a classic full body squat thrust with an external trunk rotation to add to what we were doing with the cross punches.
  • Each time you come down, place your hands square beneath your shoulders. Don’t let your shoulders round forward, keep them engaged and really support yourself through your torso – keeping your head at neutral, not looking down.
  • Thrust your feet back, coming briefly into a strong high plank, core engaged (back not arching) and then jump your feet back to your hands. 
  • As you stand, bring your hands up to your chest and rotate to the left, looking back over your shoulder. This is not a big twist, it’s a controlled movement. We don’t want to violently twist back or compromise our spine. If you have any pain while rotating, stop immediately and see your PT, chiropractor, NMT, orthopedic specialist or whoever takes care of your body.
  • Alternate sides each time you come up.
  • You can modify the squat thrust by stepping back each time and/or forward rather than jumping. 

7. 20 Side to Side Knee Jumps

  • Come into a strong plank, shoulders stacked over your wrists and your head and neck in neutral. Keep your back engaged (not arched) and jump your feet out to the right with your knees bent. Jump back to plank, then jump out to the left. 
  • Keep your hips low on your jumps – as you get tired your hips will want to lift. Try to keep them down.
  • Rather than jumping your feet side you side you can hold plank and take one foot out to the side, then the other, tapping your toe out beside you each time.

8. 10 each side Towel Ups

  • Lay on your back and bend your right knee, placing your foot on the ground. Wrap a towel or scarf around your left foot and straighten your leg as much as is comfortable for you. Climb your towel in two climbs, pausing briefly at the top to hold the upper abdominal contraction. Lower back down with control.
  • Keep your head and neck in neutral here, something that gets tougher the more you do. Try to keep your shoulders engaged, don’t allow the pulling force to fully rotate them forward. This allows you to use more core strength as you lift rather than just your arms.
  • Really tune into your upper abdominals as you lift, feeling them turn on. Play around with your foot position to see what feels more challenging.
  • You can place both feet on the floor, knees bent and wrap a towel or scarf behind your knees. Use it to assist you as you lift and lower your upper body.

Let me know if you try these moves and if you have any questions! I love hearing from you.


12-Minute Full Body Sculpt Home Workout

$
0
0

Photo Aug 06, 2 50 13 PMYOU can do this workout absolutely anywhere -

including your living room – I happened to be up in the Flatirons in Boulder, Colorado on a hike and had to take advantage of the landscape!

You can modify this workout easily in several ways – use the notes below the video for alternate moves and form tips to help you get the most out of this short, fast workout.

It takes 12 minutes if you do each move for 30 seconds and go through 3 rounds.

You can also make it longer by extending each of the moves to 45 or 1:00 – totally up to you. I recommend doing 3 rounds total for a great full body workout that targets your glutes, hamstrings, shoulders, and abs.

When you do this workout, leave me a comment to check in and let me know how you did – and which move was your favorite!

12-Minute Full Body Sculpt

Format
30 seconds each move (increase to 0:45 – 1:00 if you can, and if you have more time)
3 Rounds
If you start to lose form or get tired, switch to one of the modifications to complete the interval, then move on to the next.

1. Cross Body Reverse Lunge Touches

  • This is a great warm up move that gets your upper body moving, activates your core, and fires up the glutes, hamstrings and quads.
  • Step your right foot back behind you coming into a reverse lunge as you bring your right hand down to touch your left foot. Keep your head up and chest lifting and watch that your left knee stays in line with your left foot and the knee doesn’t go beyond the toe.
  • Jump, or quickly step to switch to a left reverse lunge, bringing your left hand down to touch your right foot this time. Continue to alternate sides.
  • MODIFY: Slow this down if you’re noticing any difficulty with this move. Come into slower alternating reverse lunges. Hold the wall beside you for support. Do not go too deeply into the lunge, only drop down to a point at which you can balance.

2. Bridge Lift Sliders

  • You can do this with paper plates, cardboard squares, towels, old frisbees, or even just your shoes – pick the appropriate slide for the surface you’re on, but you can do it on virtually any surface. You can see me kicking up dust as I slide a piece of cardboard on the dirt – which was freaking hard!! 
  • Lay on your back, hands at your sides feet straight out in front of you resting on your slide. Draw your feet in towards your butt, driving your hips up to the sky as you squeeze your glutes. This move is challenging, it’s effective and you want to go slow and really focus on each squeeze.
  • Really focus on your core and glutes as you lift up, and drag those heels in. The less resistance you have on the surface you’re on, the easier this will be. 
  • MODIFY: A great place to start is to bring the heels in and out without lifting the hips. Try that first. If you’re having trouble with your back or with the slides, you can also do bridge lifts which are a great glute exercise. Drive your heels down as you raise and lower your hips, squeezing your glutes each time. 

3. High to Low Double Jacks

  • How many ways can I get you to do something that looks like a Burpee? lol. I’m not going to stop trying.
  • Start with two fast jumping jacks. Drop down, plant your hands below your shoulders and jump your feet back.
  • Hold a strong plank with your body – core engaged, back NOT arching or sagging – keep your head in neutral (don’t look down) and jump your feet out and in twice.
  • Jump back to your hands and jump up to 2 more jumping jacks. Repeat.
  • MODIFY: As you start to get tired, step back to your plank rather than jumping back. Take out the plank jack and hold plank for 2 counts if you need a break, or hold a kneeling plank. If jumping jacks aren’t an option for you, perform 2 body squats, then come down to a kneeling or full plank. 

4. Knee Sliders

  • Get those sliders out again! Come into a tall plank, holding a strong core – back not arched, head and neck in neutral and your shoulders stacked over your wrists.
  • Slide your knees toward your chest, keeping your hips low – not lifting. As you start to get tired they will lift up, and that’s okay – but try to keep them down to really target your lower abdominals. Initiate this movement from your lower abs – your hip flexors may want to take over, but if you fire up your core and really focus on each pull in, you can help your body activate the right muscles more effectively.
  • MODIFY: You can modify this move with mountain climbers, which are an awesome exercise that will eliminate the sliding challenge. If your wrists bother you in plank, come onto soft fist or hold some light dumbbells. Another great lower abdominal move that will get you off your hands is to flip onto your back and bend your knees. Keeping your lower back pressed into the ground (it must stay there the entire time), bring your knees up, then lower down – just touching your toes to the floor and raise up again.

5. Low Side Shuffle Kicks

  • We all need to do more lateral movement! This combo move targets your obliques (side abdominals), deep core stabilizers and glutes.
  • Get down low into a crouch and stay light on your feet as you take two quick steps to the right. Plant your left foot and drive through your right hip as you kick up and forward with the right leg.
  • When you land, drop down again and take two quick steps to the left, planting your right foot and kicking with your left foot.
  • You can do a front kick, side kick, roundhouse kick or whatever feels good to you – just keep yourself moving and try to stay low in your shuffles.
  • MODIFY: Come into a reverse lunge with your right foot behind you, then as you come up, drive forward with your right knee. Repeat on the left. Hold onto the wall for support as needed. You can also try this move more slowly to the left and right, and only kick as high as you’re comfortable. It’s not easy to balance on one leg and kick high – which is why practicing it helps develop strength in your stabilizing muscles. Hold onto a wall for support and practice leaning to the side and kicking. Drive with your knee to see how that feels, and then try kicking with your full leg. 

6. Pike Push Ups

  • Want sexy shoulders? Pike push ups are super effective. Come into plank, with your shoulders stacked over your wrists and a strong core.
  • Push your butt up into a downward dog and take a couple small steps in toward your hands to get in a comfortable position. 
  • Begin to do push-ups in this position. Keep your head and neck neutral and try not to arch your back. It will curve naturally, but hold a strong core.
  • The more vertical your body is, the more challenging these become. Step your feet back as you get tired and need a little break.
  • MODIFY: Like I was saying, these get harder as we get more vertical. You can also do them on your knees. Begin in a kneeling plank, then press your hips back, elongating the space between your hands and shoulders. Press up and down in this position.  

 How did you do? Let me know if you have any questions, and what workout you want to see next!

Chest and Shoulders Exercises to Do at Home (no equipment)

$
0
0

Photo Aug 14, 12 50 09 AM
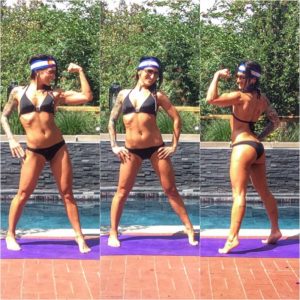
I recently got a request for a workout that targets the chest and shoulders from a reader named Cinda.

Thanks to everyone who leaves comments on my posts and lets me know they do the workouts – I love sharing fitness with you and I really appreciate you taking the time to read my blog, ask me questions and let me know what you want to see!

In response to Cinda (and anyone who was hoping I’d do one of these),  I put together a few sequences for the chest, shoulders and delts that you can do as a complete set or break off and incorporate into other workouts.

This sequence will also work your core and triceps, and I recommend combining it with the back strengthening circuit for a great upper body workout. 

All you’ll need for today’s workout is a towel, a mat (optional) and a chair, step or stool. 

Be sure to let me know if you have any questions or requests today, or just check in and let me know you tried this series!

Chest and Shoulders Workout (no equipment needed)

Chest and Shoulders: Form Tips + Mods

Warmup:

  • 30-45 seconds: Speed Bags
  • 10 small arm circles to the front
  • 10 small arm circles reverse
  • 10 big arm circles

Series 1: CHEST

8-10 Regular Push-Ups: Target your entire chest and warm it up.

  • Come into high plank, belly button hugging up to your spine, shoulders stacked above wrists, neck and head in neutral and nice straight legs.
  • Press yourself up and down.
  • Drop to your knees anytime you need to, but maintain that good form.

8-10 Diamond Push-Ups: Targets your inner chest and triceps.

  • Using the same good plank form as before, bring your thumbs and index fingers to touch, forming a diamond shape.
  • Lower and lift your chest, going down only as far as you can while maintaining an engaged core and good alignment.
  • Drop to your knees at any time. 

8-10 Wide Push-Ups: Targets your outer chest.

  • Hold a strong plank but bring your hands out wider than your shoulders. You may find this quite a bit easier to do than the last push up variation, and sometimes even easier than a regular push up. 
  • Because your hands are out wide, they won’t be under your shoulders. Focus on keeping them parallel with each other, and in line with your shoulders horizontally.
  • Hold a strong plank as you raise and lower yourself, dropping to your knees at any time.

8-10 Decline Push-Ups: Targets the Upper Chest.

  • Put your feet on an elevated surface and feel free to begin with a bottom step on a set of stairs, a low stool or low box or anything that you feel comfortable with. The trick here is to not let your back arch. Your body will naturally want to bend but you must keep it straight.
  • As you lower and raise yourself up, be sure your wrists are in line below the shoulders. Keep a slight engagement between the shoulder blades, helping to stabilize the trunk and keep your head and neck in neutral.
  • Modify this by lowering the height of your box or step. If it’s too challenging to maintain form, you can either work on holding plank with your feet elevated, or work on your regular push ups.

8-10 Incline Push-Ups: Targets the Lower Chest 

  • Place your hands on an elevated surface, bringing your body into a straight line. Push up and down from this position. 
  • Continue to maintain a strong plank position throughout the movement.
  • Do this against a wall if you’re working up to it. The farther your feet move away from the wall, the more challenging this will be.

Series 2: DELTS

10 Slow, 8 Fast: Underhand Towel Raises - targets the front and rear delts

  • Hold a towel with an underhand grip, hands shoulder width distance apart.
  • Apply tension to the towel as if you were trying to pull it apart.
  • Keeping your arms straight, slowly raise and lower your towel to chest height. When you get to 10, go for 8 fast reps.
  • The less tension you apply to the towel, the less challenging this will be. You can also do this with no towel, simply raise and lower your arms with your palms turned up.

10 Slow, 8 Fast: Overhand Towel Raises - Targets the front Delts

  • Flip your hands and hold the towel with an overhand grip. Using the same form as you did with the underhand towel raises, apply tension to the towel, as if you were trying to pull it apart. Raise and lower.
  • Do this without the towel or apply less pressure to pulling it apart to make this less difficult as you’re building up strength. Don’t worry if these are hard, these muscles don’t always get worked or targeted enough.

10 Rotating Elbow Planks – Targets the Mid Delts

  • Begin in elbow plank. Your body is in a strong, straight line just like it is in high plank. Your core is engaged. 
  • Rotate to the left onto your left elbow. Your feet can remain stacked or staggered for stability. Don’t let your hips sag toward the ground, keep them lifting.
  • Drop down to one knee as you come into side plank, and onto both knees in forward plank as shown to take some of the pressure off your shoulders as you’re developing your strength.

Series 3: UPPER SHOULDERS 

8-10 Pike Push-Ups – Targets the upper and mid Traps and Deltoids

  • Come into a downward facing dog. The farther your feet are from your hands the easier this move will become. The idea is to get your weight over your shoulders.
  • Press up and down in this position, being mindful of your back not arching excessively. 
  • To make this more challenging, add 5 more pike push ups with each of your legs lifted.
  • Walk your feet back until you can do several of these pushups. Each time, aim to come a little closer to your hands.

Final:

30-45 seconds: Reverse Plank Hold 

  • Sit down, and lift your chest. Dig your heels into the ground and place your palms beside you, beneath your shoulders. Lift yourself into a reverse plank, keeping your hips and chest lifting.
  • Try to avoid looking down or up, let your head find a comfortable neutral.
  • If this is a bit tricky, walk your feet in to a reverse tabletop position and continue to hold yourself up.

Stretch Your Chest

For a brief tutorial on how to do this properly, CLICK HERE (opens in a new tab).

I recommend pairing this great sequence with the Back Strengthening workout or incorporating these moves into your warmup before lifting on chest or shoulder day. 

Let me know if you have any questions, and what you’d like to see next – and remember that building a strong, balanced and fit body is about more than exercise! Dial in your eating with whole foods that burn fat naturally and keep your metabolism fired up – use my 30-day Eating System for great nutrient balancing information and how to apply it with a 4-week meal plan!

Thanks for watching and reading, your feedback is always appreciated! 


Weekend Dreams Full Body Shred Home Workout

$
0
0

Photo Aug 26, 1 00 05 PMGet ready for the weekend with this crazy fun circuit that strengthens your ENTIRE BODY and absolutely torches fat! 

I thought my face was going to melt off after 3 rounds of this – and I did 0:45 seconds of each move!!

The modifications I’m going to show you are a great place to start if you’re a beginner, but try one or two of the more advanced move in your set  - you never know what you can do until you try!

If you’re intermediate to advanced, do as much of the move shown as you can and if you burn out before your interval is up, go right into the modified move to complete your time.

Don’t stop moving. 

You can thank me later :) 

Weekend Dreams Workout

FORMAT:

3 Rounds. Little rest (0:05-0:10) between each move, short rest (0:10-0:20) between each round.

  • BEGINNER: 0:30 seconds each move
  • INTERMEDIATE: 0:45 seconds each move
  • ADVANCED: 1:00 each move

Form + Mods

1. Heismans

  • Get your arms and legs moving with this full body warmup move I learned from the famous Shaun T! Knees drive up high and to the sides as you pump your arms. This is like high knees, but you’re driving your knees out and to the sides and really working your arms.
  • MOD: If you need a break, take it down a notch and do alternating high knees.

2. Roll Back to Jump

  • Also known as “reverse burpees” this is a great move for core stability, your glutes, legs and your HEART. Roll back and as you come forward, bring your feet in close to your glutes creating a strong base to support you as you stand and jump.
  • MOD 1: When you’re learning this move, keep your hands down at your sides to support you on the jump to stand.
  • MOD 2: If you start to get winded but want to finish that interval, take the jump out and roll back to stand.

3. Decline Push-Ups

  • Get your feet up on an elevated surface and come into a strong plank: wrists in line with your shoulders and hug your belly button up to your spine to engage your deep stabilizing core muscles. Don’t let your back arch.
  • Press yourself up and down. Go as deep as you can while maintaining good form.
  • MOD 1: Take it down a notch to regular push-ups without the elevation.
  • MOD 2: Come down to your knees whenever you need to – you’ll be getting a great workout in this position too. This will help you build strength to do it on your toes, or if you’re burned out it will let you get in those last few reps.

4. Lunge Circle

  • This is super fun and incredibly effective for your legs – quads, hamstrings, glutes and calves – as well as your core. Begin by lunging in front and across. Lunge straight in front, then out to the side. Lunge back and then back and across.
  • In every lunge, let your knees track in line with your toes. Maintain your balance. Keep your chest up. Slow it down if you get wobbly and focus on form, coming down as deep as you can in each lunge. In your front lunges don’t let your knee go past your toes. 
  • When you get to the last lunge, begin again with the other leg exactly where you left off, forming a complete circle.
  • MOD: If you need a break or some of the positions make your uncomfortable, come right into lunge pulses in place and switch legs every 5.

5. Tuck Jumps

  • Get your heart rate back up with tuck jumps, my favorite move that I like to watch people do in slow motion haha. Jump vertically, driving your knees up to your chest. As you start to get tired, they’ll have a harder and harder time coming up but keep pushing.
  • Be sure you’re landing on something giving.
  • MOD: Come right into body squats if you need a little breather but want to stay in the game, or if you have any trouble jumping. In your body squats, shoot your butt back behind you, keeping your chest up and don’t let your knees go past your toes.

6. Rotating Elbow Planks

  • Come into a strong elbow plank, with your shoulders in a straight line with your elbows. Keep your head and neck neutral. Draw your belly button up toward your spine and don’t let your back arch. 
  • Keeping your back in a straight line, rotate your hips to the right, and then to the left. Your legs should stay straight and your upper body shouldn’t move. 
  • MOD 1: If you have any trouble with the rolling, hold your plank and don’t move.
  • MOD 2: If you want to try it on your knees, that’s a great way to get used to the movement.

7. Alternating Dip Kicks

  • Come into a reverse tabletop. Dip with your arms and alternate kicking your feet. Try not to let your hips dip too low, keep them up.
  • Position your hands so they’re facing toward your body. You can hold light dumbbells to align your wrists if that’s more comfortable for you. 
  • MODS: Take a break when you need to and hold your reverse tabletop, and add in slow dips with alternating lifted legs to finish your set. Holding reverse tabletop is a great place to start with this move, and slowly add in the dips, then alternate lifting legs. The dip kicks are super advanced, so start where you are and work your way up! 

 Questions? Comments? Be sure to Check In below and let me know how you did on this workout!

Get more bodyweight workouts you can do at home in this section: Anywhere Workouts

15-Minute Full Body and Killer Core Workout – No Equipment Needed

$
0
0

Photo Sep 09, 11 03 42 PMJoin me and my friend Mimi was we cruise around Denver on the Ruckus on our way to workout in City Park!

Expect to get an amazing core workout, get your heart rate up and work your entire body – and be done in 15 minutes with today’s workout!

If you have the opportunity to work out outside, take it. Breathing fresh air and moving around just feels natural. 

But wherever you are, you won’t need any equipment for this workout, and you can work your entire body with these awesome moves.

Be sure to check in and let me know how you’re feeling after you do this workout – hearing you worked out with me lets me know we’re kicking butt together!

In the video demo, I’m doing each move for 0:30 – start there, and if you can do 0:45 or 1:00 get after it!

Full Body Burn Workout

Format: 3 rounds
Beginner: 0:30 each move | Intermediate: 0:45 each move | Advanced: 1:00 each move
Short rest between each move, short rest between each round.

1. Box or Step Jumps

  • This is a great hamstring and glute activator that requires your core to stabilize your lower body as you jump up and down. 
  • Load your feet and leap onto an elevated surface. It could be a box, step, or edge of a fountain. Land softly with your feet in line and extend your legs. Jump back, again landing softly and keep your weight back in your heels. Keep your chest lifted throughout the jump and use your arms to propel you. 
  • If this causes you any pain or is difficult, you can step up and down to train the same muscles with less impact. Be sure to really press through your heels each time you come to stand, and lower back with control. 

2. Alternating Single Leg Push-Ups

  • Add a little extra challenge to the chest and triceps by lifting your left leg and then lifting your right. You can alternate with each press, or you can do 3-5 on one leg then switch like I am.
  • Be sure to hold a strong plank throughout this entire movement. Hug your belly button up toward your spine, and drop both feet down if lifting becomes to tiring.
  • You can also perform this movement on your knees. With both knees on the ground, come into a strong plank, then lift and straighten one leg. Perform kneeling push ups with alternating straight leg lifts, or simply do kneeling push ups with both knees on the ground to build strength in your upper body.

3. Jump Switch Lunge

  • This move gets your glutes and quads – and will really get your heart rate back up!
  • Begin in a lunge position with your right foot forward, with up to a 90 degree bend in the knee. Press through your right heel and spring up from your back foot, switching your legs in the air and land in a lunge with the left leg forward, right leg back. 
  • Continue to jump switch lunge, landing softly and keeping your chest up. 
  • Slow it down and do alternating forward and reverse lunges without the jump if you need a break, or aren’t comfortable jumping. Only go as deep in the lunge as you’re comfortable going.

4. Side Plank Knee Crunch (split time between each side)

  • Awesome combo move for your obliques and shoulders, come into a high side plank with your feet either stacked or crossed in front of one another.
  • Square your hips in front of you, avoiding the tendency to roll forward or back as you crunch your upper knee up to meet your top hand. Keep your head and neck in neutral and engage your core.
  • Drop to an elbow plank and/or drop the bottom knee down to work on building your strength for this advanced move. All variations will effectively work your obliques and strengthen your shoulders.

5. Crescent Kicks (split time between each leg)

  • Get ready to jump around and have some fun with this great fighter move that works your hips, glutes and lower abdominals!
  • Come into a fighter stance with your left foot slightly in front of your right, and get light on your feet. Go ahead and bounce around a few times, bringing your hands up by your face.
  • Your kick will come from your back leg, and you’ll want to imagine you’re going to draw a crescent with foot during the kick. So it arcs up (as high as you’re comfortable with) and across in front of your body. Land back in your stance and bounce a couple times to reset and do it again. Do half of your time on one leg, then switch.
  • You can kick low, or turn it into a knee kick. This is a great way to see how tight your hips are, and if one is tighter than the other. The hip joint is generally not super flexible, and this is a very good move to remind it how much it can move. Follow this up with some pigeon stretches to open up your hip if you feel tight or have a hard time kicking up.

6. Alternating Side Jump-Ins

  • An awesome move for you shoulders, arms, obliques and lower abs!
  • Come into a high plank, hugging your belly button up toward your spine. Jump your knees under you toward the right and then jump them back to start. Jump in to the left. Repeat. Go at a pace you can maintain – this is supposed to be challenging!
  • You can modify or slow this move down and still target the same muscles by switching to cross body mountain climbers. Simply hold you high plank and bring your right knee over toward your left elbow. Bring it back to plank. Then bring your left knee across toward your right elbow. Go as fast or slow as needed, and focus on you plank form. 

Where did you do this workout? And what part of your body felt it the most?

Do you like workouts like this?

Would you like to workout with me live in class every week, plus have access to all of my eating and workout programs?

Click Here to take Rock Your Life Challenge Classes!

TRX Leg and Booty Workout

$
0
0

Photo Sep 23, 12:20:18I got a TRX for my house because I love how this simple system takes my bodyweight workouts to the NEXT LEVEL!

They have them at a lot of gyms, and if you want to put one in your house you can order one on Amazon.

I love mixing up my workout programs throughout the year, and after 8 weeks of lifting I wanted to give my joints a break and focus back on calisthenics.

So I’m combining TRX resistance training with my famous bodyweight circuits – and feeling awesome!

To learn the most effective TRX moves and stay on point with my lean, shredded body goals I got a 12-week TRX workout program from the legendary Dan Long.

I’ve been working my way through the Intermediate program. I thought I was strong – haha! These moves are super challenging and I feel sore for days afterwards. 

I love Dan’s approach to TRX training. He uses these same methods with the celebrities he trains – I like the “less is more” approach –

….as in, spend less time doing MORE effective workouts that recruit multiple muscles – to see MAXIMUM results in less time. 

Check out a these leg and booty moves that will give you sore buns and totally strengthen and sculpt your lower half! 

Do each move for 0:30 or 0:45 and go for 3 rounds – here’s the full 12-week program I’m using, Suspension Revolution – but if you get it, send me your receipt so I can send you one thing it doesn’t come with – a free meal plan!

1- Plyo Jumps
2- Alternating Single Leg Front to Back Lunge
3- Plyo Jump Switches
4- Single Leg Squat Hops
5- Hamstring Curls to Scissors
6- Runners on your Hands
7- Single Leg Curl and Hip Raise

If you get the 12-week Suspension Revolution program I’m using, send me your receipt so I can send you a Free copy of my 7-day Eat Clean Train Mean Plan to help you get totally set up for success!

You can send your receipt to teambettyrocker@gmail.com and I’ll send you a copy of the meal plan right away (includes a grocery list, healthy recipes, daily menu and food prep – with vegetarian options, and it’s gluten and dairy free).

Click Here to Get Suspension Revolution and Your Free Bonus Eating Guide!

It will be awesome to do this with you – I’m sore after ever workout and I’ve been having so much fun with this training style!

Full Body Yoga Sculpt

$
0
0

Join me and the awesome Coach Kylie for a full body yoga sculpt session that will tone, stretch and strengthen your entire body!

This flow will work your entire body, but it especially focuses on:

  • Core 
  • Lower Body: butt and legs

You could do this workout:

  • Morning
  • Post-Cardio
  • Evening
  • Active Recovery Day
Take your time. Some of the poses will be easier, some will be more challenging. Focus on your breath, and on stretching not only your body, but your awareness of being inside it.
 
It doesn’t matter if you do every pose, it is not important that you go as deep as I do in your lunges. It is fine if you get wobbly, fall out of a stretch or lose your balance (you’ll see me do that several times!)
 
YOGA, just like this challenge workout program, is a PRACTICE. Our daily practices add up to habits…and our habits are the foundation that shape our lives.
 
I love how yoga reminds me to have balance in my body between stretch and strength – something I need to be reminded of in my life as well. What about you?
 

How did this workout make you feel? Comment below!

 
Connect with Coach Kylie online for more of her great energy and instruction!
Coach Kylie on YouTube
Coach Kylie on Facebook

7 Best Flat Belly Exercises with Betty Rocker and Natalie Jill Fitness

$
0
0

Photo Sep 30, 17:04:27I went to visit my friend and fitness expert Natalie Jill recently, and of course we worked out together!

Natalie is 43 and not only is she in amazing shape, she has a beautiful chiseled 6-pack! That wasn’t the case a few years back though, after she gained 50 pounds during her pregnancy she told me she was determined to get her body into the best shape of her life – so she could take better care of herself and set an example for her daughter.

I asked her to share her secrets with us, and in today’s workout she’ll tell you her 3 tips for getting flat abs – and 9 of her best exercises so you can ROCK your body with us!

7 Best Flat Belly Exercises with Betty Rocker and Natalie Jill Fitness

Suggested Format:

Do each move for 0:30-0:45 
Repeat entire sequence 2-3 times total!

WARM UP: Elbow Plank

1. Tall Plank – keep your shoulders stacked above your wrists. Hug your belly button up to your spine, and don’t let your back arch. 

2. Walking Plank – start in Tall Plank. Holding the same strong core, lower yourself to your elbows, then press back up to tall plank again. Continue at a smooth, steady pace.

3. Sit Outs – start in a Tall Plank. Draw your right knee under and across to the left, sweeping your foot out to the side. Return to tall plank and repeat with the left leg.

4. Inchworm 1 arm raises – Start standing. Bend forward and walk your hands in to a tall plank. Reach one arm up and out, balancing on 3 points. If you have a buddy, slap hands like me and Natalie. Walk your hands back to your feet and stand up tall. Keep your core engaged throughout.

5. Side plank reach thrus – start in a side plank. You can stack your feet or place one foot in front of the other. Keep your hips square and lifting. Lift your top arm up high, then reach it through and under your body, following with your gaze. Reach back and repeat. Do both sides!

6. Reverse plank walk – Start in a reverse plank, legs out straight, hips lifted. Lift and lower your feet slowly. This is great for your back and core!

7. Side shimmies – Lay on your back, and raise your head up slightly. Bend your knees. Keeping your hands out beside you, reach them down your body side to side.

You can drop to your knees for most of the plank moves – work at your fitness level, and build the strength in your core and arms. Go at a pace that’s right for you!

NOEL COVER 4Get more from the awesome Natalie Jill and check out her programs on her website - she’s a wonderful coach and trainer and one of my good friends!

PS – if you use the code BETTYROCKER at checkout, you’ll get 20% off any of her digital programs and products. She’s the best!


Ninja Pop Ups Progression Tutorial: Best Move for Amazing Abs

$
0
0

Photo Oct 24, 16 46 56The full ninja pop up is an *advanced* move that requires a LOT of deep core strength.

Some of you will be able to do this right away, but for the rest of us, it’s important to learn the progression so you can teach your body what to do and develop the strength in your lower abdominals to really make it happen!

ALL of the moves I’m showing you in this little demo are amazing for your lower abs, so take your time, don’t force yourself to learn it in one day, protect your knees and DON’T do this if you have any injuries or pre-existing conditions that cause you pain.

This is NOT a good move for everyone – and I expect you to NOT do this if you have any trouble with your knees!

If this isn’t a good move for you, CHECK OUT THIS VIDEO for some other super effective LOWER ABS moves!

If you want to try the ninja pop ups (which were featured in Week 4 of the Live Rocktober 2014 Challenge) – follow along with today’s video and try them out!

1. Kneeling, hop yourself forward.
2. Kneeling, hop forward and up at the same time.
3. Kneeling, and holding onto a chair or couch hop up, one leg at a time. Remind yourself of how to do this by standing one leg at a time.
4. Try the pop up. I fall down sometimes :) Be sure to do this on a soft surface.
5. Try the advanced version if you master the pop up – add a tuck jump or jump onto a bench or step. SUPER CRAZY!

Have fun!! Be careful!

10_14_hangout_playJoin us for the Live Challenge – workout with me and the other members and get a fresh challenge workout every week – appropriate for ALL fitness levels – cooking demos, special guests, a live support forum and SO MUCH MORE! 

CLICK HERE to Find Out More!

Total Body Awesomeness Home Workout with Kate Vidulich

$
0
0
kate bio pic

Kate Vidulich, BSC, ACSM, CTT

If you’re looking for a total body workout that you can do at home, in less than 25 minutes, no equipment required, you’re in the RIGHT PLACE!

In this week’s Rock Your Life Challenge Class, we were joined by special guest trainer Kate Vidulich, Australian fitness rockstar, fat loss expert, and the creator of Fat Loss Accelerators.

In addition to the killer workout we did, Kate and I talked about how she got into fitness and the major wake up call that got her to get serious about fat loss and a healthy lifestyle.

We talked about the difference between good and bad fat, how to calculate your body fat percentage, Kate’s 3 secrets to burn fat sustainably and a whole lot more on the live call. 

Join us for the highlights of our class and get all 7 moves from the workout!

Total Body Awesomeness Workout with Kate V. and B. Rocker


Kate has a new program out, it’s called Bodyweight Cardio 500 and it’s AWESOME!! She added a special discount for the Betty Rocker Fit Fam…

Click Here to Check Out Bodyweight Cardio 500.

Format: 3 rounds,  little rest (0:05-0:10) between each move, short rest (0:10-0:20) between each round.

  • BEGINNER: 0:30 seconds each move
  • INTERMEDIATE: 0:45 seconds each move
  • ADVANCED: 1:00 each move

FORM + MODS

1. Bulgarian Split Squat

  • Using a chair or bench, place the top of your left foot on top of the chair or bench. Plant your right foot on the ground with enough room so that your knee doesn’t go over your toes when you squat down. 
  • Start by squatting down as low as you can go and then come back up. Repeat on the same leg for half of the time, and then switch legs.
  • MOD: Hold onto a wall or chair back to help your balance, or work on regular body squats on 2 legs

2. Walk Out to Cross Body Mountain Climbers

  • Start by standing up straight. Reach your hands to the ground and walk out to a plank position.
  • Do 4 cross-body mountain climbers by bringing the opposite knee to elbow. Walk your hands back to your feet and stand up.
  • MOD: Use any modification you need to come from standing to full plank. For example, drop to your knees and walk out to a kneeling plank. You can also do bicycle crunches here if you need to get off your shoulders.

3. Air Jump Rope

  • Jump up and down with both feet together, like you’re using a jump rope. Do any jump rope variation you like! Stay light on your feet.

4. Single Leg Reverse Dead Lift (RDL) to Curtsy Lunge

  • Stand on your left foot, pressing through your left heel. Reach your arms out or forward and slowly hinge forward at the hips, allowing your right leg to lift behind you. Keep your hips square. Try to keep a slight bend at your knee. 
  • Return to start and bring your right leg behind you to a curtsy lunge. Repeat on the same leg for half the time, then switch.
  • MOD: Hold a chair back or wall each time you hinge forward to help with balancing. You can also simply perform reverse lunges on your right leg, then switch to your left.

5. Split Shuffle

  • Standing up tall, shuffle your feet back and forth in place. 

6. Bodyweight Renegade Rows

  • Start in a tall plank position with feet slightly wide, row one hand up to meet your ribcage and bring it back down to the floor. Repeat on the other side and continue like this for the entire time. Really focus on squeezing your back during the row.
  • Keep your belly button hugging up toward your spine and try not to let your hips roll up. You can add weights to this if you have some.
  • MOD: Do this on your knees.

7. Burpees

  • Begin standing. Squat down to place your hands on the floor below your shoulders. Jump or walk your feet back so that you are in a tall plank position. Do a push up (knees or toes). Jump or walk your feet back to your hands and jump up into the air. 

This workout will take you less than 25 minutes and will burn some serious fat, strengthen your entire body and probably melt your face off :)

My #1 tip for handling Holiday food is to do one of these workouts the day of or the day before – the afterburn effect will have you maximizing your fat burn for up to 38 hours post workout.

I hope you REALLY enjoy your holiday – for me it’s all about gratitude and being thankful.

I’ve started a special Gratitude Burpees Challenge with my members this holiday season – whenever we have burpees in a workout we have to say a gratitude with each one. I challenge you to try it!

I’d love to see YOU in class, so be sure to check out the Rock Your Life Membership Program and hear what other members are saying!

Happy Holidays!

Gratitude Burpees

$
0
0

born to be awesome quoteOne small Positive Thought in the morning can change your whole day!

I’ve started a morning practice recently with this in mind.

I wake up and do 20 burpees.

Sounds fun, right? haha. I know.

But actually I started doing something cool with my burpees. Every burpee I do, I think of a person or something in my life that I’m grateful for.

It’s been kind of amazing. I’m on Day 17 of my gratitude burpees (that’s an extra 340 burpees I wouldn’t have gotten under my belt this month) and I’m feeling pretty darn good about life and everything I have.

I bet you an think of some things in your life that are awesome too.

That’s the thing about gratitude – the more we practice it, the more stuff we realize we have to be thankful for, the better we feel about life, and the more that effects everyone we come in contact with.

#gratitudeburpees

It’s kind of like burpees…the more I do them, the less I hate them. Because 20 doesn’t feel like too much now – it’s actually getting to be something I look forward to.

And I always feel a sense of accomplishment when I’m done.

That’s a nice way to feel first thing in the morning, actually.

Grateful and accomplished.

So I invite you to do these 20 burpees with me right now, and post a few things down below in the comments that you’re thankful to have in your life.

You’ll inspire others, and you’ll inspire me. 

Thanks for reading….leave your comments below.

shadow-ornament

Photo Nov 30, 4 41 04 PMJoin me for live fitness challenges every week in class -

tune in from absolutely anywhere -

get support in the private member forum and gain access to all past class replays.

Click Here to learn more!

Hot Legs Challenge

$
0
0

Comment below if you’re up for this Hot Legs Challenge! ️

Just 6 moves you can do at home with towels (or paper plates on a carpet)!️

3-4 rounds, 0:45-1:00 each move! 
1. Side slides – work those inner and outer hips and thighs! Make sure the stationary leg is stable and knee is tracking in line with the toe, and don’t slide out too far! Hold a chair back for balance as needed
2. Front Slide lunge (right, then left) – one leg slides forward and back while the other leg stays stationary. Do both legs. Use control, and hold the wall or chair back for balance as needed!
3. Reverse slide lunge (right, then left) – similar to #2! One leg is stationary and the other slides forward and back to lunge. Just like all lunges be mindful of the knee, don’t lean too far over it.
4. Bridge lift slides – add a whole new dimension for your hamstrings and glutes with the sliders! Really lift your hips up high and dig those heels down to slide!
5. Windshield wipers- lift up into your hands and dig your heels down. Lift through the hips and keep them high. Open and close your feet quickly. You can hold yourself up on your elbows on a couch if this bothers your wrists.
6. Reverse runners- same position as #5 but this time run your feet in and out! Go fast! Keep your hips lifting!
Like it? I loved it, just did it! Tell a friend and share, and comment below if you’re doing this!

Photo Dec 28, 4 09 26 PMIf you’re taking the 30 Day Challenge be sure to check in and let me know how you’re doing!

Want to take it? Sign up right here!

5️ Move Booty Challenge️

$
0
0

Photo Mar 20, 10 55 24 AMWhat’s up ROCKSTAR!

I got inspired at home and took my booty workout up a level – onto a couple chairs!

When you try this, please make sure your chairs are secure (on a carpet or against a wall) so they don’t move and so you can be safe and focus on the squeeze and not on falling!

It’s just 5 moves – have fun, and comment below if you try this!

Make sure you signed up for my free 30-day home workout challenge if you haven’t taken it yet!

4 rounds, do each move for 1:00

1. Bridge Lifts : hold the chair back and press your heels into the other chair seat. Drop your booty down in the space between them and lift up high, squeezing those glutes. The space between the chairs will increase your range of motion in the lift, making it even more challenging!

2. Single Leg Hip Lifts: extend one leg out straight and lift and lower your hips just like you did in #1. Keep your hips square to the ceiling, don’t let them roll. Keep your core engaged and don’t arch your back. Do half your time on each leg.

3. Single Leg Lift Kicks: maintain a lifted bridge and straighten your right leg. Begin to lift and lower it quickly. Keep pressing through the other foot and stay steady through the core. Repeat on the other leg once you hit the halfway point.

4. Side Plank Leg Lifts: these are just an awesome bonus move for your core and outer thighs with the leg lift. It’s going to feel trickier balancing up here on the chairs than it does on the floor and you’ll want to work on holding that side plank before you start adding the leg lift. Don’t let your hips roll forward or back, and keep that elbow stacked below your shoulder. Half on each side.

5. Booty Blasters: I love this move!!!! Get a good solid grip on the chair sides and extend to a tall plank. Drop your right knee down and to your chest, then sweep it up and behind you. Half on the right, half on the left!

Heather MA great body STARTS IN THE KITCHEN – are you eating the right balance of nutrients to melt fat and support your exercise plan?

Get the 30-Day Plan today!


Cryotherapy Review

$
0
0
Photo Feb 23, 17 19 41

Cryo What?

While I was in San Diego a couple weeks ago, my super healthy fitness friend (#shff) A.J. was telling me about a treatment he uses to speed up his recovery between tough workouts where he gets into a below freezing chamber and stands there for 120 seconds.

Cold therapy treatment isn’t new – though this quick, simple application of it is. Cold therapy has been used for pain management, inflammation reduction and healing for a long time – and if you’ve ever gotten into an ice bath (ugh, painful), iced a joint, jumped in the snow after a sauna or the lake after the hot tub, you have some idea what I’m talking about.

I was super keen to try it for myself, so when I got back to Denver that’s exactly what I did! The facility I go to (Cherry Creek Spine and Sport) is frequented by professional athletes, weekend warriors and clients seeking performance enhancement, pain management, faster healing and a variety of conditions I’ll be asking Dr. Scott Sheil-Brown about in today’s interview.

Join me for the treatment, and then I’ll sit down with the doctor and ask him all of my questions about Cryotherapy, what conditions can be treated with it, how cold it REALLY is in there, and how it fits into the other therapies he offers in his clinic.

Join Me for a Cryotherapy Session and Interview with Dr. Scott Sheil-Brown

The Process

1. As you can see from the video, I’ve got my robe on and I step into the chamber. Girls, we wear nothing but a pair of socks and gloves (it was a good day to have a beanie on though that’s not required). Guys, you have socks, gloves and boxers.

2. Once you’re in the tank, the doc uses the hydraulic lift to raise you up so your head is out of the chamber. It would be too cold and claustrophobic to keep your head in there in that cold. Hands and feet are covered to protect the extremities as all your blood rushes to your core, and you remove your robe once you’re inside.

3. Once your head is out, he begins the treatment. He doesn’t leave the room, as you can see. Cold blasts come at you and the temperature is around -250 C as Dr. Scott goes over in the video. It’s a bit unpleasant for sure, but it’s over quickly – 2 1/2 minutes to be precise. I generally don’t feel really cold until we’re at the 1 minute countdown mark, which is what we’re laughing about in the video, I made it a whole 10 seconds longer this session before asking him how much time was left.

4. Once you’re done, you put your robe back on, the doctor lowers you down and you step out. That’s it!

How it Works

Whole Body Cryotherapy (WBC) is a cold air therapy designed to reduce musculoskeletal pain and inflammation.

The therapy works by standing inside a cryotherapy chamber for a treatment session that lasts 2-3 minutes.

Cold air is blown over the body to stimulate the sympathetic nervous system, causing a dramatic peripheral vasoconstriction followed by a dramatic vasodilatation.

The Cryosauna (what I’m standing inside of) uses gasiform nitrogen to lower the skin surface temperature by 30-50 degrees Fahrenheit over a period of two-three minutes.

The Cryochamber is cooled using liquid nitrogen, but clients are not in direct contact with the gas. The skin reacts to the cold and sends messages to the brain that acts as a stimulant to the regulatory functions of the body.

It produces the scanning of all areas that may not be working to their fullest potential. The skin exposure to the extreme temperatures also triggers the release of anti-inflammatory molecules and endorphins.

Research conducted over the last two decades has established therapeutic efficacy of cryotherapy in a wide range of clinical areas.

Most research has been focused on pain management and athletic performance.

It has been shown to effectively reduce pain and swelling and improve physical performance.

Due to the numerous adaptive physiological responses, cryotherapy has also been studied as an adjunct treatment for atopic dermatitis, cardiovascular health, depression, Multiple Sclerosis, rheumatoid arthritis, adhesive capsulitis, etc.

As Dr. Scott says during our interview, cryotherapy can certainly be used on its own, but it really enhances other treatments that manage pain and helps speed up recovery.

Why I’m Using It

I don’t have any pain or specific conditions that need to be treated right now, but I am doing tough workouts that make me sore.

I’m using it more as a performance enhancement and I really enjoy how good I feel after my sessions – physically and mentally. It definitely gives me an endorphin boost.

Read More

If you want more information about Cryo, check out this page on Cherry Creek Spine and Sport’s website and feel free to write them with any questions you have.

Yoga for Athletes

$
0
0

Photo Apr 18, 11 07 28 AMHi my friends! I’m in the midst of an impromptu 14-day Challenge that I got my friend Scott Colby (The Abs Expert) to do with me. He’s turning 44 (I like that number) in a little over a week – right after his “Unplugged Retreat” actually, where I’ll be a guest instructor.

He told me his birthday was coming up while we were at brunch with some friends last week and I immediately threw down the gauntlet for this 14-day challenge….naturally haha.

We have been doing a 10-20 minute workout each day, and posting them on our Facebook pages for everyone to participate (you can get them all here).

Today I wanted to share our full length yoga for athletes workout – because one thing Scott and I both need is more stretching, probably like a lot of you! It’s easy to forget about, and just go hardcore over and over but it’s the stretching that really opens up our muscles and allows us to get stronger in the other workouts we do.

15-Minute Yoga for Athletes

In this 15-minute athletic yoga flow, you will increase your flexibility in your back, shoulders, hamstrings, quads and calves. Be where you are at and work on increasing your flexibility each time you do yoga.

One of my favorite things that Scott points out at the end is how present we can be when practicing yoga (and exercising in general!). We are so inundated with technology and going so fast every day, it’s nice to have even 15 minutes to just focus on our bodies and move and breathe.

Let me know how you like this stretching sequence, and join us for part or all of the 14 day Challenge! I’ve gotten a bunch of messages asking if they will be up forever or if I’m taking them down – they will be posted forever on our fan pages, so you can start now!

14-Day Challenge Workouts on Betty Rocker’s Facebook

14-Day Challenge Workouts on Scott Colby’s Facebook (great if you have a guy in your life you want to encourage to do this challenge with you!)


7-Day Abs Workout Plan

$
0
0

Are you ready to strengthen your core and sculpt a lean, defined stomach? Use this awesome plan to burn up your core.

Learn the Moves (plan below):

Use the 3 ab sequences below throughout the week and the demo video to learn the moves, and any modifications I have for you too!

A strong core has more benefits than just looking good – it’s active in nearly every move your body makes, and when it’s strong will help you move faster, have better balance, and protect your back.

Speaking of your back, you’ll find some back strengthening moves in this core workout plan because a strong back works in concert with your abdominal muscles, helping to stabilize the spine and support your trunk in all of its movements. Don’t leave those moves out – developing good back strength will actually help your abs develop faster as the body always seeks balance.

How to Use the Plan:

Do workouts A, B and C on non-consecutive days throughout the week.

You can repeat this plan for several weeks, alternating the 3 sequences that I’ve listed below for you. For best results, don’t train your abs on consecutive days – give them a rest.

You can add these routines to the end of another workout, or incorporate them into a workout you’re already doing. I train my abs 2-3 times a week – so alternate these sequences throughout your week for the most benefit!


WORKOUT A:

FORMAT: Beginners: 0:30 for each move | Intermediate to Advanced: 1:00 each move
Repeat 3 times. Add the Bonus Burn move in each round.

1. knee tucks
2. wide leg slides
3. alternating v-ups
4. supermans

Bonus Burn: jumping jacks


WORKOUT B:

FORMAT: Beginners: 0:30 for each move | Intermediate to Advanced: 1:00 each move
Repeat 3 times. Add the Bonus Burn move in each round.

1. mountain climber drags
2. hand reach under
3. reverse planks
4. side plank toe taps

Bonus Burn: jump squats


WORKOUT C:

FORMAT: Beginners: 0:30 for each move | Intermediate to Advanced: 1:00 each move
Repeat 3 times. Add the Bonus Burn move in each round.

1. pike slides
2. bent knee reach ups
3. knees to hands
4. supermans
5. floor wipers

Bonus Burn: jumping jacks


ABS are Made in the KITCHEN! Start the 7-Day Jumpstart Challenge Today - with a 7-Day Meal Plan and a new video Challenge each day (fat burning workouts and hot body strategies) to get your body lean, mean and feeling amazing!

7 day jumpstart3

Best Complete Abs Workout (video guide)

$
0
0

Photo Jun 05, 3 50 27 PMWhen it comes to training your abs, you want to make sure you’re targeting all of the key layers of muscle for best results.

That’s why I like to combine a sequence of movements that includes the deep stabilizing muscles of the abs and back, as well as targeting the obliques, lower and upper abdominals.

This circuit is one that hits all the most important elements for abs strength, and will give you a phenomenal result.

There are 3 main moves, but with the other options you’ll actually have a total of 7 different ab moves to try.

Do this circuit 1-2 times per week, ideally with other ab circuits (like the ones in my Hot Abs Workout Guide below).

Best Complete Abs Workout

watch this video for workout move demos. use the form tips below for reps, format and more on form.


Format:
3-4 Rounds total
Rest briefly between moves, rest 0:30-0:45 between sets.

Move 1: Alternating Walking Plank - 10 each side

  • Come into a tall plank position, hands stacked below your shoulders, core engaged, back not arched. Legs are straight, gaze is about 6 inches in front of you, head and neck in neutral.
  • Find your balance point and lift your left arm and right leg out straight, keeping your hips stable. Smoothly lower down and extend your right arm and left leg.
  • Each time you put your hand back down, be sure it's just below the shoulder.
Photo Jun 05, 3 02 03 PM

Option: Bird Dogs - 10 each side

  • Come into tabletop, knees below your hips and hands below shoulders. Engage your core, don't let your back arch. Gaze is about 6 inches in front of you, head and neck are neutral.
  • Extend your right arm and left leg out straight. Pause and squeeze your glute for a little bonus booty, then return to starting position. Repeat on the opposite side. Keep your hips steady, and core engaged.
Photo Jun 05, 3 02 27 PM

Move 2: Leg Raise with Slow Lower - 8-10

  • Begin on your back on the edge of a bench, holding the sides above your head. Allow your legs to come down slightly over the sides.
  • Engage your core. Press your back down. Use your lower abdominals to lift your legs straight up overhead, lifting your hips up high. Pause and hold here, and then slowly, with control, lower your hips back down to the bench. Your hands will assist you with controlling the descent.
  • Extend your legs out straight and repeat.
  • Do not rush this movement. If you fatigue quickly with this after 1-2, move into one of the options below and continue to build strength.
Photo Jun 05, 3 03 44 PM

Option 1: Small Hip Lift - 10

  • Lay on your back on the edge of a bench, holding the sides above your head. Legs out straight, slightly over the bench.
  • Smoothly lift your legs up straight, lifting your hips up. Bring them directly back down to the bench without pause and straighten the legs.
  • Repeat.
  • Keep your core engaged. Don’t let your back arch.
Photo Jun 05, 3 04 27 PM

Option 2: Bent Knee Lift - 10

  • Lay on your back on the edge of your bench, holding the sides above your head. Knees are bent, feet are over the edge.
  • Engage your core and be sure your lower back is making contact with the bench.
  • Lift your knees up straight over your body, lifting your hips and pressing up. Bring them back down without pause and repeat.
Photo Jun 05, 3 04 40 PM

Move 3: Hanging Knee Raise Side to Side - 8-10 each side

  • Grab the overhead bar and lift yourself up. Palms face forward, and hands are wider than shoulders.
  • Engage between your shoulder blades, drawing them in and down slightly to protect your shoulders.
  • Engage your core. Don’t let your back arch excessively, your spine is in neutral.
  • Draw your knees up toward your left chest. Lower them down, then draw them up to your right chest.
  • Don’t swing your hips around, if you start to swing, bring yourself back to a stable and secure position before continuing.
  • It’s absolutely fine to perform half of your set, take a break from hanging and finish.
Photo Jun 05, 3 05 23 PM

Option: Side to Side Knees (on Floor)- 10 each side

  • Lay on the mat on your back with your knees bent, core engaged back not arched. Hands at your sides, feet together.
  • Using your lower abdominals, draw your knees up and to the right side of your chest.
  • Smoothly lower, optionally touching the feet down, or keeping them lifted slightly (more challenging) then draw them up and to the left side of your chest.
Photo Jun 05, 3 06 01 PM


Check in Below and let me know how you do, and post any questions that you have!


order form images


Ready for more?

Grab the Hot Abs Workout Guide, with 50 Ab Moves and 7 Complete Workouts - with Video Demos and printable guide with pictures and form notes written out for you!

CLICK HERE for Special Betty Rocker FitFam Discount!


The 3 Most Effective Booty Building Lifts: Squats, Deadlifts and Forward Lunges

$
0
0

The 3 Most Effective Booty Building Lifts

Sample Workouts to incorporate these moves below.


Who wants to build their BOOTY?

Today I’m joined by 2 other awesome CPT's who happen to be great friends of mine! Maddie Berkey specializes in Olympic Lifting and Crossfit. Jessica Williams is a WBFF Competitor - Maddie and I are actually going to see her compete this weekend here in Denver!

We got together in my gym this week to break down 3 of the MOST effective booty-building lifts so that YOU can practice them all with proper form and see great results when you include them in your workouts.

Work hard on these moves, and when you're ready for a COMPLETE PROGRAM to follow, get your hands on LIONESS, the ultimate women's strength training program!

shadow-ornament

Move 1: SQUATS

Squats really are amazing for building a great looking butt - which is really just a byproduct of their true benefit which is developing strong, balanced glutes to support and stabilize your pelvis and all the movements you do.

  • Photo Jun 18, 15 25 41
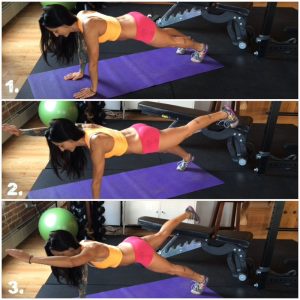
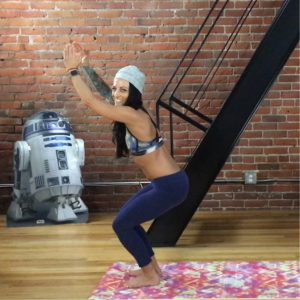
Keep your feet shoulder-width apart or slightly wider, knees tracking in line with your toes as you squat down. Drive your butt back, and keep your core engaged.
  • Don't let your back arch and keep your chest up. Keep your weight in your heels and stay light in your toes.
  • One way to avoid pitching your weight forward or bending your chest down is to work with a box or step behind you to touch your butt down to. It will help cue you to keep your weight back.
  • To properly get the bar off the rack, position it slightly below shoulder height and step beneath it, bending the knees slightly. Keep your head nice and neutral, arms slightly wider than shoulder width with a medium grip.
  • Form is paramount here, and becomes even more imperative as you add weight.  Inhale as you come down, drawing your belly button up and in, engaging the transverse abdominals (don't worry if you don't feel this muscle, it's your body's natural weight belt and stabilizes your lower spine and pelvis when you're under load). Exhale as you stand up. 
  • We want to squat to 90 degrees or slightly below, but it's most important that you are able to do this move with proper form. So if you find that you are losing your core engagement, or your back starts arching, your one of your knees collapses in at a certain point, work on the depth you can achieve while maintaining correct form and each time you squat, work to go just a little deeper. It is very helpful to do squats with a mirror to check your form, or to work with a spotter, buddy or trainer.

Recommended: 3-4  sets.
How to pick your weight: if you can easily perform 15-20 reps, your weight is too low. if you're struggling to get through 5-6 reps, you're a little heavy - unless you're using a specific training program and are an experienced lifter. Aim for a weight that you can nail 8-12 reps with great form, feel through your glutes and legs and is challenging for you.

Move 2: DEADLIFTS

Deadlifts are a super versatile lift that hit the hamstrings, lower back AND glutes. You can vary the position for less intensity on your back if you have any issue there - and if you're not familiar with this lift I recommend trying it with dumbbells and/or an unweighted barbell to get comfortable with the set up and positioning.

  • Photo Jun 18, 15 26 57Standard Deadlift place your feet hip distance apart, keep a soft bend in the knees and grab the bar. Your knees will change angles during a standard deadlift. Stick to this lift if you have lower back issues, and be conservative with the amount of weight used.
  • There are a few variations for your grip - try an overhand or mixed grip, both work great. You may find that a mixed grip comes in handy during heavier lifts.
  • Engage your core and keep your hands in close to your shins. Your back will be flat, tension in your hamstrings and glutes. Lift the chest and press down through your heels to lift the bar, squeezing your glutes.
  • If you're using a loaded bar with weight plates touch them down and pause to reset your weight back in your hips and heels before driving back up. Imagine you're pressing the earth down away from you.
  • If you're using dumbbells, don't go all the way to the floor, just go to flat back.  
  • Be mindful of not rounding your back, even if you’re putting the bar down at the end of your set.
  • Keep your shoulders engaged and a light tension between them to keep them from hyperextending. 
  • Stiff-Leg This variation targets the glutes and hamstrings a little more than the standard deadlift. Everything above applies, except rather than bending the knees you'll simply have a soft bend in them when you grab the bar. As you come up, press the knees back and drive through the heels.

Recommended: 3-5 rounds. I like doing drop sets - so 12, 10, 8 and 5 - going up 5 lbs total with each round. You can also try doing a solid 4 rounds of deadlifts for 8-10 reps each.

Move 3: FORWARD LUNGES

The forward lunge gets your quads, but as you press back from your front toe, you'll feel it majorly work your booty! In fact, you'll feel the work on both sides of your glutes as you shift between each leg. Pay close attention to your form - anytime we are doing a unilateral (single leg) move, it's easy to become unstable. One of the reasons this move is so effective is because it will force your intrinsic stabilizers to kick on and help you - in your core and in your hips.

  • Photo Jun 18, 15 27 38Stand with the bar across your shoulders, evenly balanced and with a light but firm grip. You can also hold dumbbells at your sides.
  • Your gaze is in front of you, core is engaged, shoulders are back, chest up.
  • Step forward with your right leg, coming into a forward lunge. Evenly balance your weight on your front foot, not allowing your knee to collapse in.
  • Your knee is lined up with your toes, and not beyond them.
  • If you have the flexibility, drop to 90 degrees but only if you can do it with good form.
  • Press into your front toe to press yourself back to standing. When you do that press, you'll really feel the glutes working.
  • Repeat on the left leg. Watch your form as you switch legs - we all have a dominant side and sometimes even a subtle hip rotation can cause some variation in your form between each leg.
  • It's great to have a mirror to watch yourself in to keep from wobbling side to side.

Recommended: 3 rounds. Aim for 8-10 each leg. See above for choosing proper weight.

Warming up for your Workouts

Be sure to warm up before your lifts with some plyo - jump rope, run, do hip swings - just get the blood flowing and the muscles warm to prepare them for the work ahead.

It is also super important to warm up for individual heavy lifts by progressively adding weight. Let’s say you’ve got squats and you know you’re going to be lifting 95 pounds. You wouldn’t just put 95 pounds on the bar and start banging out squats!

The first set should just be the 45 pound bar for a set of 10 reps. After that you’d do a set of 65 for 5-8 reps and maybe one more set of 80-85 for one more set of 3-5 reps.

The stronger you are, and the more weight you’re lifting, the more warm up sets you will need to do. For example, if you are deadlifting 225 pounds you’d do a set with the bar, a set with 95, a set with 135 and a set with 185 and one final set of 2-3 reps at 205 pounds.

After you have completed the 2-4 warm up sets you begin your work sets.

Stretching and Foam Rolling

I recommend getting on the foam roller after you train - I spend just a few minutes total after every workout and it makes a huge difference. The foam roller really lets you open and smooth the fascial layer, that deep connective tissue that surrounds and connects all your muscles. Think of it like getting a deep tissue sports massage!

Don't forget to stretch. It's much better to stretch warm muscles - so I usually stretch just after my warmup and/or after my workout.

Sample Workout 1

3 Superset Rounds. Take 1-2 min rest between exercises. Complete 3 rounds of each superset before moving on to the next.

Squats* 12,10,8
Jump Squats (bodyweight) 10-15

Forward Lunges 10 each leg
Kettlebell Swings 10-15

Reverse Curtsy Lunges 12 each leg
Wall Sit Hold 45-60 seconds

*go up in weight and down in reps each set

Sample Workout 2

3 Superset Rounds. Take 1-2 min rest between exercises. Complete 3 rounds of each superset before moving on to the next. 

Deadlifts (style of your choice) 10
Burpees 10

Hamstring Ball Roll Ins 12
Ball Pikes/Jack knife  10

Single Leg Hamstring Curls (machine or ball) 10 each leg
Glute Bridge Hold 60 seconds

IMPORTANT: Don't complete leg workouts on consecutive days. Muscle grows when we rest it, NOT when we're training it. So give that hard work you did a chance to show up by taking a day or two between training the same muscle group. It's fine to train other body parts the next day if you feel well-rested and recovered and can give it 100%, but listen to your body.


Get the Full Body Women's Strength Training Program - LIONESS - to strengthen and sculpt a beautiful fit, physique and define your abs, legs, glutes and arms!

lioness total packageMeal Plans, Video Demos, Downloadable Guides and 8 Weeks of Training with your Coach, Betty Rocker!

Available Now - CLICK HERE!


Featured in this Article

Bree Argetsinger, AKA Betty Rocker: CHEK Certified Exercise Coach, Nutrition Educator and Health Coach
Get more motivation from Betty Rocker on her Facebook and Instagram pages!

Madeline Berkey: CPT specializing in CrossFit and Olympic Lifting, Holistic Nutritionist
Get more from Maddie on her blog at www.MadWellness.com

Jessica Williams: CPT and WBFF Competitor
Get more from Jessica on her Instagram Page @rocknfitdiva

The Top 7 Questions Women Ask About Weight Training

$
0
0

The Top 7 Questions Women Ask About Weight Training


What's up ROCKSTAR! Today I’m joined by 2 of my good friends -who are also trainers - to answer the Top 7 Questions Women Ask About Weight Training.


Since so many of my wonderful readers are using the new Lioness Strength Training Program, I wanted to take a few minutes to answer the most common questions I get - from women of all experience levels.

Coach Maddie Berky and WBFF Pro Jessica Williams are here to add their perspective and experience to the discussion and to help you get the best information.

1. Am I going to Bulk Up?

Bree: The first thing I want to mention is that it is VERY challenging to put on muscle mass in general. Even men, who have higher levels of testosterone, have to work hard to put on mass. Women - you are not going to get bulky just by adding heavier weights to your workouts. As you add lean muscle, your body burns more calories at rest - so you’ll be burning more fat and adding muscle. Weight lifting sculpts those beautiful body lines.

Maddie: This is a HUGE fear for a lot of women. When we focus our success and failure on the number on the scale, it becomes really dangerous. What’s tricky with a weight training program is that you are putting on beautiful muscle, but your weight may not change much because muscle is more dense than fat - meaning it takes of less space for the same amount of weight. So your clothes may be fitting better and you’re feeling great, but when you step on the scale the number may be more than before. Taking the scale out of the equation is the first thing you should do.

Jessica: Weight lifting gives women those nice supple curves that we love - you should never be scared of weight lifting making you bulk up.

2. Do I need to take supplements?

Bree: Your supplement approach should always be goal-dependent. Most of your diet and nutrients should come from real food, but adding in things like protein powder is fine too. I am currently adding lean muscle, so I use protein powder to ensure I get enough protein each day. I use a vegan, sprouted grain, plant-based protein powder that’s sweetened naturally with stevia. It’s important to find a quality product. If you’re using whey, look for grass-fed. If you choose to take supplements, please be careful when reading the labels and opt for the most natural form you can find.

Maddie: My main goal is to recover quickly and support the work I do at the gym. I eat real foods like chicken breast and sweet potato to recover after a hard workout. I don’t use protein powder at all anymore.

Jessica: I am currently training for a WBFF show, so I do take supplements. I also like having real food when possible - I like the same thing as Maddie, chicken breast and sweet potato. I also take a BCAA drink for recovery, multivitamin and fish oil.

3. How should I approach eating?

We all want to stress that getting most of your nutrients from real foods - healthy protein, complex and simple carbs, healthy fats and plenty of greens - as opposed to relying on supplements or pre-made foods is ideal. In the next couple of questions we're going to address pre and post workout eating specifically. 

One of the biggest mistakes people make when it comes to eating and exercising is NOT EATING ENOUGH. Usually people get hung up on food myths like eating fat will make you fat, or eating carbs will bulk you up. And many, many women just do not eat enough food in general.

There is also a terrible habit of skipping meals, thinking this will help you get leaner. But this actually depletes your body and can have the opposite result because your body thinks it's starving and it will hold onto the fat you have. Skipping meals and not getting enough essential nutrients will mess up your hormones, slow down your metabolism, wreak havoc on your energy and sabotage the results you should be able to achieve.

Following a good plan if you are still learning about how to put meals together that contain the essential nutrients is an awesome idea. It's difficult to navigate through the cultural myths and subtle messages about dieting, not to mention all of the advertising and products marketed at women that can trick you into buying things that don't really help you get healthier, lose fat or get lean.

4. How should I eat Pre and Post-Workout?

Bree: I focus on carbs and protein pre- and post-workout. I do include a little fat pre-workout during breakfast - I usually have eggs, greens and toast.

Maddie: This is the one time of the day where fat might not be totally appropriate to include. I like to have a little fat pre-workout because it settles my stomach, but the macronutrients you want to focus on are carbs and protein. Protein with build, maintain and repair your muscles, while carbs will be an energy source and to help replenish the energy lost during a workout. I usually choose a lean protein like chicken or turkey with a half a sweet potato.

Jessica: My favorite fat is avocado so I’ll have avocado on eggs with oats before a workout. After a workout I’ll have carbs like sweet potatoes or rice with chicken breast.

5. What's the difference between using barbells, dumbbells and machines?

Bree: I’m a fan of using a combination of all three. Some machines I will use for a different exercise than they are intended - like the hamstring drop in Lioness Phase 1. I like machines because they help isolate muscles if you’re a beginner because when you add weight with a barbell or dumbbell, you are less stable. 

Maddie: There are so many options when you walk into a gym. A barbell is a wonderful way to add load because it’s symmetrical and more stable. Dumbbells are less stable, which can be helpful if you’re working on stabilizing muscles. Form is super important here. Machines are my least favorite because they are “one size fits all” and they don’t necessarily work for everyone’s body. They are less intimidating and more stable, so they’re a great place to start.

Jessica: Machines aren’t my favorite either. They help with form and fires up the correct muscles, but they aren’t the best for me.

6. How do you choose the right weight?

Bree: It really depends on your goals at the moment. If you’re looking to add mass, you want to choose a weight that allows you to hit 6-8 reps per set of the exercise before you really fatigue. If you’re working on endurance or strength, choose a weight that lets you hit 8-12 reps before you really fatigue. Always stop lifting before your form starts to suffer. Your mind-body connection is super strong, so you always want to train with proper form. Don’t try to bust out 10 reps just because that’s what is prescribed. Listen to your body.

Maddie: Every day will be different depending on many factors. Really be aware of how you’re feeling before a workout. Adjust your weight and reps accordingly. 

Jessica: Lift as heavy as possible for YOU without sacrificing your form. Even if you have to drop weight during your next set, that is better than having bad form.

7. I feel intimidated going to the gym...how can I feel more confident?

Bree: It’s really important to familiarize yourself with the equipment at the gym. Watch YouTube videos or Google some of the names of different lifts. Every gym will be different. You’ll have all the video demos for Lioness, plus workout trackers and downloadable PDFs. You belong here - you don’t need to doubt yourself. 

Maddie: Figure out what’s going to make you feel strong and powerful and practice that. Adopt a power pose and walk in to the gym like you mean it. “Fake it till you make it!” Have a plan of attack so that you aren’t coming up with exercises on the fly. Find a really solid, easy to follow plan like Lioness. Establish why you’re doing the program - don’t get stuck on a purely aesthetic reason. Keep asking that “why” and you will uncover the real reasons behind your hard work. 

Jessica: Personal trainers are about $500 for 10 sessions, and you may not feel confident on your own even after those sessions.

No matter where you start, you are right where you’re supposed to be.  I know you can achieve your goals!  Let me know if you have any questions, comment below!


Get your hands on the Lioness Strength Training Program for the Absolute Best Guidance and Complete Plan to follow!

lioness total package

Click Here #bealioness


15-Minute Power Yoga Flow

$
0
0

15 minute power yoga stackIf you’re like me, it’s easy to get in go-go-go mode around the holidays.

It just seems like there’s so much to do, and never enough hours to get it all done!

And that’s just crazy, right?! – because the holidays are supposed to be about slowing down, giving thanks, and spending time with people we love.

One of my favorite ways to reset my body and get super grounded is to do a yoga session.

But most classes are an hour long, and sometimes I need to just jump in and get a good stretch with some bonus power moves to really feel present in my body.

Full disclosure, I am NOT a yoga instructor, but I have been super fortunate to work with some amazing ones, and I practice at least once a week, drawing on what I’ve learned and what my body needs.

I invite you to join me for this 15-minute power session I put together to help me stretch key areas that get tight like my shoulders and legs, strengthen my core and focus on my breathing and on how grateful I am to have this strong, healthy body.

Thank you so much for joining me today – and I’m wishing you a wonderful holiday!


PS. A quick personal note and 2-step Gratitude exercise if you'd like to participate....

I appreciate you so much! Thank you for being part of my Fit Fam! It would be so easy to think of all the things about myself I'd like to improve, but instead I will tell you something about myself I'm proud of.

I'm proud of having made the 30 day challenge this year. It was really hard to do actually!

I had to film a 15 minute workout each day, which I started doing in December (when I set out to do this, I was like, no problemo...but sticking to something daily is harder than it seems!). I had to edit each video, make a web page for it to live on, write a PDF for it and an email too with descriptions of each move - all while running business as usual.

And about half way through production on it (right after Christmas) my dad died and I was so devastated I almost didn't have it in me to keep going and finish it.

I made it live January 1st, and I had only completed half of the videos. Somehow I finished it, sometimes filming 2 videos a day so that people who had started wouldn't run out of workouts to do.

As I was doing this, I learned a lot. I learned that life is crazy but when we make a commitment to ourselves, it's up to us to follow through.

I also got so much strength from seeing how much the challenge was motivating and helping others, and I learned that no matter what we are suffering or dealing with, it is possible to find comfort and motivation through what we have to give. My dad did this his entire life.

That inspired me to keep going, even though I was sad a lot and wanted to quit.

When I look back now, over 90,000 people have taken it this year, and I have received countless emails, messages, photos, comments and videos - and I can see the far-reaching impact it has been having on the people I care for so much, you - my Fit Fam.

Thank you for sticking with it. Thank you for being strong role models to the people in your life who watch you. Thank you for believing in yourselves and for believing in me!

I could not do what I do without your support, nor would I want to. It's really hard for me to write stuff like this sometimes, because I don't ever want to take focus away from what you are here for.

But I know that so many of you are here because like me, you are striving for greatness through adversity and if I don't tell you what I'm dealing with myself, you might think I'm some kind of automaton that never struggles haha. The truth is, I struggle all the time. I write this blog as much to motivate myself as I do to motivate you. So thanks, from the bottom of my heart, for reading it.

Quick happiness exercise:

1. In the comments below, name 3 people you appreciate and are grateful for (feel free to add more than 3!)

2. Tell me something about yourself that you are proud of.

22


For more resources:

Photo Nov 22, 8 29 14 PMThere are so many wonderful yoga instructors out there to learn from - you probably know of some!

For a great online yoga resource, check out my friend Adriene of Yoga with Adriene, who has an amazing YouTube channel and blog.

A very special thank you to Cassey Ho of Blogilates for sending me the beautiful new yoga mat I'm using in today's video! She has an incredible YouTube channel with all kinds of workouts you would love, so be sure to check her out too!

For amazing streaming and downloadable yoga, be sure to check out Qi Flow Yoga and Fitness on Yoga Download, I have worked with many of the instructors in these videos personally - they are amazing, and you'll love their knowledge of the body and beautiful flows.

If you have a resource you'd like to share with me and the Betty Rocker community, please do post in the comments below, along with any questions or thoughts you have. I always love hearing from you!


The post 15-Minute Power Yoga Flow appeared first on Betty Rocker.

Viewing all 363 articles
Browse latest View live