Quantcast
Channel: Workouts Archives - The Betty Rocker
Viewing all 363 articles
Browse latest View live

Hotter for the Holidays (Part 1) 15-Minute Full Body Workout

$
0
0

Photo Nov 29, 8 53 59 PMIn the final weeks of the year, a time when we all get super busy with holidays, family, events, parties and trying to finish all those projects, I find it essential to have some fast, effective workouts I can do at home.

This month in the Betty Rocker Fitness Community, we’re doing 4 weeks of time-saving workout programming, and in today’s blog post I’ve got a great time-saving circuit you can do at home – with or without a little equipment.

This year one of the most essential themes I’ve found true for myself has been about playing what I call the “long game,” which for me has been learning to be consistent (with my workouts and in every area of my life), master my thoughts, manage my time wisely, and choose actions that lead to the greatest good, even though they may not be instantly gratifying.

Sir Edmund Hillary, New Zealand native, mountaineer and philanthropist said it best:

“It’s not the mountain that we conquer, but ourselves.”

I hope you find yourself looking back at this year feeling accomplished and proud of all you’ve done so far! This is your chance to fit in those last workouts of the year and make yourself a priority.

Enjoy this workout, and feel free to bookmark it to use anytime! Comment below and let me know you’re going to do it, and if you have any questions!


Hotter for the Holidays Full Body Circuit

FORMAT:
2-4 rounds, depending on how much time you have for prescribed reps.
2 rounds=15 minute workout
3 rounds = 21 minute workout
4 rounds= 28 minute workout

10 each leg Step Ups

  • Grab 2 dumbbells or weighted objects in  your house and stand in front of the stairs, a stool or bench.
  • Step up on your right foot, pressing through the heel as you lift your left foot out behind you.
  • Step down with control and repeat.

10 Ball Sit Ups (or Floor Reach Throughs)

  • With the Swiss Ball: position your body over the ball, feet planted firmly, hands behind your ears for stability. No pulling on your head or neck.
  • Lift and lower your torso, initiating the movement from your upper abdominals. Keep your spine neutral and your head from curling forward or back.
  • Without the Swiss Ball: lay on your back with your knees bent, pressing your lower back down into the floor or mat.
  • Place your fingertips lightly behind your ears and raise your torso up, peeling it off the floor, trying to lift your shoulderblades up. You can reach through your knees, then return your hands back as you come down.

10 Push Ups

  • Come into plank, either on your toes or knees. Back is straight, no arch or sag, core is engaged and legs are straight and strong behind you.
  • Stack your hands below your shoulders and lower down with control. Press back up. Try varying hand position widths each round for an extra challenge.

10 each side Floor Wipers

  • Lay on your back, holding your weights or some weighted objects directly above your chest. Engage your shoulderblades together slightly, and feel the back of your shoulders make contact with the floor.
  • Press your lower back down into the mat or floor, and extend your legs straight. Lift them up and to the right, keeping your hips down. Extend them out again, and lift them up and to the left. This is one.
  • Alternatively you can build a ton of strength in your lower abdominals in preparation for the straight leg lift by bending your knees and raising them up and down to either side.

10 Bent Over Rows

  • Come to standing, holding your weights or weighted objects.
  • Engage your core (draw your belly in and up toward your spine slightly or imagine the tension you'd add to your abdomen to brace for a punch in the gut) and hinge forward at the hips to a 45 degree angle, allowing the weights to hang in front of your body.
  • Add a slight engagement between the shoulder blades so your shoulders aren't rotating forward while you're holding the weights.
  • Draw your elbows smoothly up and back toward the ceiling, focusing on lifting together and lifting to the same height. Be sure not to use too heavy of a weight as you're learning these. I've used mini seltzer water jars or cans of pumpkin puree at home lots of times!

10 each side Liberty Lunges

  • Stand in the center of your mat or space, holding your weights or weighted objects at your sides.
  • Step to the right, bending the right knee in line with the right toe. Shoot your butt back behind you as you lunge, not dipping too far forward at the chest.
  • Allow your weights to come to either side of your right foot. The left let is mostly straight. Don't step out too wide and hyperextend the knee or strain the groin.
  • Press away with the right foot to come back to center, and step out to the left, repeating your liberty lunge on alternating sides.

10 Sumo Squats

  • Stand tall, optionally holding your weights at your shoulders. A barbell works great too, or you can do this move without any weight at all.
  • Feet are stepped out wider than hip distance, toes turned out slightly.
  • Engage your core, and shoot your butt out behind you, squatting down while maintaining an upright torso. Your back does not round.
  • Pause briefly at the bottom and engage your glutes. Press down and away with your heels, pressing back up to stand strong, squeezing the glutes on the way up.

10


Have you gotten the free 30-day Fall Workout calendar? CLICK HERE

Have you taken the free 30-day Home Workout Challenge yet? CLICK HERE

Wanting to be part of the online fitness community and get workouts, support and motivation from me? CLICK HERE

The post Hotter for the Holidays (Part 1) 15-Minute Full Body Workout appeared first on Betty Rocker.


Hotter For the Holidays (Part 2) FULL BODY HIIT Home Workout

$
0
0

Photo Dec 08, 8 21 39 PMAlright, alright alright – following up on last week’s full body resistance training session, we’re going to burn it up again today with this full body HIIT circuit you can do at home!

Have you done a HIIT (stands for “high intensity interval training”) workout before?

It’s super fun, fast, and incredibly efficient if your goal is to maximize fat loss in a short time!

Typically a HIIT workout (which can be as short and efficient as 4 minutes – think Tabatas or as long and painful as 60 lol) pairs an intense work period (from 5 seconds to 8 minutes long) performed at 80-95% of your estimated maximal heart rate, with a recovery period that may be equally long but not exceed 40-50% of your maximal heart rate.

Some of the benefits of HIIT include:

  • improving aerobic and anaerobic fitness
  • strengthening the cardiovascular system
  • improving insulin sensitivity (which helps the exercising muscles more readily use glucose for fuel to make energy)
  • challenging the fast-twitch muscle fibers (the ones that are awesome for strength, power and looking lean and mean)
  • reducing abdominal fat and body weight while maintaining muscle mass
  • making you more badass :)

Sound good? I think so too! Join me for today’s workout – let’s HIIT IT!


Below you'll find the workout notes and form tips - if you want to repeat the workout for additional rounds, jump back to 6:20 when I start round 1.

Post in the comments and let me know how you do with this workout, how your holidays are treating you, and what workouts you'd like to see next!

I'd love to see you in class - our next 30 Day Challenge starts January 1st! You can check out my Rock Your Life Fitness Community and online class program right here - we do challenges every couple months as a group, and there are structured workout programs between challenges, as well as guidance for using your meal plans and other workout programs. You're welcome anytime!

Workout Format + Notes

FORMAT: Each move for prescribed Reps. 2 rounds is AWESOME, 3 rounds is ROCKSTAR, 4 rounds is INSANE :)

Round 1 starts at 6:20 if you want to jump back and do more rounds after you do the first 2 with me.

Move 1: 10 Jump In, Jump Out, Tuck Jump, Cross-Cross

  • Load your weight in your heels and drive your booty back behind you, jumping up and landing lightly in a squat. Jump again, this time landing in a wide sumo squat, knees tracking over your toes.
  • Keep your chest up. Jump again, driving your knees up to your chest.
  • When you land, drive your right knee up and across to meet your left elbow and repeat with the left knee and right elbow.
  • To modify, take out the jumping and instead do a body squat, keeping your weight in your heels, chest lifting. Hold a chair or the wall for support and only go down as deep as you can while maintaining good form.
  • Step out to a wide squat and squat again in a sumo squat. Stand and drive one knee up then the other, then drive your knees across to opposite elbows.

Move 2: 3 Total Around the Body Lunges (optional weights/resistance)

  • If you're using weights or weighted objects at home, hold them on your shoulders or at your sides, keeping your shoulders back and chest open. If you aren't using any weight that's great too, keep your hands on your hips or wherever they are comfortable for you and help you balance.
  • You'll perform a forward, side and reverse lunge with your right leg, then pick up with your left in the reverse lunge, completing a circle around your body.
  • Be sure to keep your torso upright as you lunge. Don't round your back. Keep your knees in line with your toes, and work at a steady, controlled pace with excellent form.

Move 3: 10 Warrior Burpees

  • Plant your hands beneath your shoulders and jump back to tall plank, holding your belly button in and up to keep your core engaged.
  • Drive your right knee under you and up toward your left chest, then your left to right in 2 cross body mountain climbers.
  • Jump your feet back to your hands, loading the weight in your heels and pop up, smoothly kicking one leg out straight, then the other. It's also great to do high knees if the high kicks don't work for you.

Move 4: 3 Rounds of 5 Triceps Dips, 5 In & Outs

  • Come to a tabletop position, with your chest open and your hands beneath your shoulders hips lifting and knees bent at 90 degrees.
  • You can have your hands flat, on soft fists or holding dumbbells to align your wrists if that helps. Point your elbows straight back and perform shallow dips.
  • After you complete 5, come to a seated position with your hands behind you (or up off the mat for advanced) and lift your legs. Begin to drive them in and out, as you lower and lift your torso at the same time.

Move 5: 40-50 Heismans

  • Stand and drive your right knee up high to the side as you bring your right elbow to meet it, performing a side crunch. Quickly perform the same movement on your left side, running your legs as you go.
  • Try to keep the knees driving up high, and a fast pace. You can slow it down and do side crunches anytime you need a break.

Move 6: 10 Walking Planks

  • Come to tall plank on your knees or toes.  Engage your core and keep your shoulders aligned over your wrists and gently pulled back (not rounding forward).
  • Lower yourself down to your elbows, keeping the elbows in the same good alignment with your shoulders as your hands were, and maintaining the engaged core. Walk back up to your hands. Continue.

19


You may also enjoy:

Hotter for the Holidays Part 1 - 15 Minute Full Body Resistance Training Workout

Full Body Home Workout: Endurance Tabatas

10 Moves for Booty, Abs and Legs - Home Slider Workout

References:

The post Hotter For the Holidays (Part 2) FULL BODY HIIT Home Workout appeared first on Betty Rocker.

Holiday Home Workout Survival Guide

$
0
0

Photo Dec 20, 3 24 23 PMIt’s the most wonderful time of the year….and if you need some quick, super effective workouts you can do no matter where you find yourself, I’ve got your back!

I have 3 mini circuits you can do anywhere, anytime – in your Christmas booties, in your stockings or barefoot – and you can do them all in a tiny space no bigger than a cot.

How to use this guide: 

  • Use the video for form tips and modifications.
  • You have 10 moves total, divided into 3 zones, abs, legs & booty and upper body.
  • You can do the entire 10 moves as one circuit and repeat 1-3 times or
  • Grab 1 zone and do 1-3 rounds, then do another one when you have another few minutes to spare
  • Great to share with your relatives or sneak away and do in the guest room at grandma’s :)


Great Job!! Share this workout with your friends and relatives and have a Happy, Healthy Holiday!

Looking for something to do after the Holidays are over? Click Here to Find Out More About the New Year’s 30-Day Challenge!

Holiday Home Workout Survival Guide

Zone 1: ABS (begins at 00:40)

  • Leg Lifts (20)
  • Cross Over Leg Reach (10 each side)
  • Leg Circles (10 each direction)

Zone 2: LEGS & BOOTY (begins at 05:05)

  • Jump Switches (20)
  • Plie Pulse (20)
  • Sumo Jump Squats (15)
  • Reverse Curtsy Lift (15-20 each leg)

Zone 3: UPPER BODY (begins at 10:43)

  • Push Ups (10)
  • Triceps Extensions or Dips (10)
  • Bentover Rows Combo (15 total, combine wide and narrow)
  • Reverse Flyes (10)

5 BONUS Healthy Holiday TIPS:

#1: STAY HYDRATED:

You’ll help support your body’s digestive processes and metabolic balance, prevent fatigue and mood swings and lubricate your joints and tissue when you stay hydrated. Use a handy app like me to remember to sip on that water bottle regularly throughout the day (and night!)

#2: EAT GREENS:

The fiber in greens will help keep all that rich food moving through your digestive system, provide you with vitamins and micronutrients to keep your immune system strong, your brain sharp, and your body healthy.

Even if you can’t get a green smoothie in every day over the holidays, you can eat a few handfuls of mixed greens, baby spinach or romaine to give your body some roughage. A great thing to do if you can’t stop craving sweets, or have just totally overindulged on candy lol – try it, it’s amazing. It will curb the cravings and help your body process that stuff.

#3: PACK YOUR TRAVEL KIT:

When I travel, I take my portable green juice powder, my protein shake packets, squeezable food packets, epic meal bars, and a shaker cup.

I’m all about the portable healthy foods to keep me fueled when I don’t have a lot of good options or I’m just hungry and away from my house!

#4: MAKE A DESSERT:

This tip will make you popular :) Contribute one of my healthy, delicious dessert recipes to your holiday gathering. You’ll be sure to have something nutrient dense and delicious to eat and everyone will love it!

#5: BE PRESENT:

Don’t sweat it if you eat too much dessert. Don’t beat yourself up if you don’t do a workout. Be present to the people you love and enjoy the holiday time. You don’t get to do today over, there’s only one of them. Make it count, and enjoy yourself.


Photo Dec 20, 15 15 14

Want to Check Out the 30-Day Bodyweight Shred New Year's Challenge?

It's happening in the Rock Your Life Membership Community and it starts January 1st!

Click Here for all the Details and to Join Us!

The post Holiday Home Workout Survival Guide appeared first on Betty Rocker.

New Year’s Full Body HIIT Ladder

$
0
0

Photo Dec 31, 1 05 55 PMHappy New Year Rockstar!

I can already tell 2016 is going to be EPIC!

To kick it off, I’ve got an amazing home workout in what’s called a “ladder” format – you’ll be doing 2 awesome moves back to back counting up in reps, then we’ll change them up a bit and go down the ladder in reps.

You’ll see what I mean in today’s video!

Hey, if you’re joining me and the other Rock Your Life Members for the New Year’s 30-Day Challenge, this is your Day 1 workout!

Tomorrow’s workout will be in your member email :)

If you’re not a part of my fabulous membership community you can find out all about it and join right here.

New Year's Day Full Body Ladder Shred

Moves 1 and 2 you'll do UP the ladder, Moves 3 and 4 you'll do DOWN the ladder

1- Burpees

  • Stand with your feet hip distance apart.
  • Bend your knees and plant your hands on the floor or mat in front of you (hands stacked directly below shoulders) and jump or step your feet back into a tall plank position.
  • Keep your core tight and do a push-up (optional) - jump your feet back to your hands and load your weight in your heels.
  • Jump up, landing softly with bent knees and repeat
  • MOD: take out the jumping by stepping back, take out the push-up, or do a body squat instead of a jump at the top

2- Leg Lifts:

  • lie down on your back and press your lower back into the mat to engage your core.
  • straighten your legs out long and lift them to 90 degrees
  • with control, lower your legs back down together without letting your lower back arch
  • MOD: do this move with bent knees to take some of the pressure off of your back

3- Squat Thrust Crossovers:

  • stand with your feet hip distance apart.
  • bend your knees and plant your hands on the floor or mat in front of you (hands stacked directly below shoulders) and jump or step your feet back into a tall plank position
  • perform 1 cross body mountain climber per side by running one knee to meet the opposite elbow and repeat on the other side
  • jump your feet back to your hands and load your weight in your heels - jump up, landing softly with bent knees and repeat.
  • MOD: step your feet back into tall plank or take out the jump at the top and just do a body squat

4- Sit-Up Cross Punch:

  • lie down on your back with your lower back pressed into the mat and bend your knees. you can hook your feet under a couch or leave them on the mat without anything.
  • hold your hands in soft fists at your shoulders and engage your lower abdominals to sit up
  • at the top, do 2 cross punches, really driving across to engage your obliques.


AWESOME job! Thank you for starting the New Year with me!

Post down below and let me know how you did – I’m so excited for this coming month! It’s going to be amazing!

If you’re looking for support, community and challenges, Click here to join us now!

The post New Year’s Full Body HIIT Ladder appeared first on Betty Rocker.

Booty and Legs Sculpting Circuit – No Equipment

$
0
0

Photo Jan 13, 12 20 53 PMWhat a great start to 2016! Thank you for all the birthday wishes and kind words – I had one of my best birthdays ever.

Turning 39 feels amazing, and I’m super excited for the year ahead and all of the great things we’ll be doing together here on the blog and in the community!

I did the moves in this workout while I was in my hotel in San Francisco and I was super sore the next day – you’re going to love it!

It’s a killer low-impact circuit that will tone and sculpt your booty and legs  – you don’t need any equipment and very little space in case you want to take this on the road.

My #tencents for the day: One of the most important things I’ve learned that relates to our workouts together is to never be discouraged if you are in a different stage of your fitness progress than me or someone else. How do we get stronger or discover what we’re capable of unless we can see what’s on the horizon?

I didn’t build my websites and brand by starting out knowing everything or being very good at any of this lol. I did find a lot of inspiration in seeing other successful people and modeling after them – and I think the same thing is true in fitness. Focus on the direction you want to go and do the work to the best of your ability. It is this process that develops your strength, teaches you the skills and techniques required, and allows you to have the necessary struggles and obstacles to navigate to accelerate your learning curve.

You’re a ROCKSTAR and YOU CAN DO IT!

Enjoy today’s workout – I’m looking forward to hearing from you so leave me a note below to check in! 

Jump to workout start for your additional rounds: 2:30

Booty and Legs Workout Moves

Format: do 1-3 rounds for prescribed reps

Booty and legs1. Full Body Extensions (20)

  • Stand with feet hip distance apart. Engage your core and keep your chest up.
  • Sit back to squat like you were going to sit on a chair, keeping the weight in your heels, hands come down to touch your feet. Only go down as deeply as you can go while maintaining good form.
  • As you come back to stand, squeeze your glutes and raise your arms high overhead.

2. Straight Leg Extensions (25 each leg)

  • Come down to tabletop. Drop down to your left elbow and straighten your right leg, extending it out to a 45 degree angle to your hips.
  • Maintain a steady and stable torso as you lift and lower your leg, feeling your glute muscles engage.

3. Leg Circles (15 clockwise, 15 counterclockwise each leg)

  • Perform on the right leg after you finish your right leg extensions before switching to do both moves on your left leg.
  • Keep the leg extended and perform circles clockwise, then counterclockwise for prescribed reps.

4. Ceiling Stomps (15 each leg)

  • Come into tabletop and engage your core. Your hands are stacked below your shoulders and knees are below hips.
  • Keeping your knee bent, press your right heel up toward the ceiling, firing up your right glute. Complete all prescribed reps on the right leg, then switch to left.
  • To add additional challenge, hold a dumbbell behind your knee.

5. Elevated Alternating Bridge (10)

  • Each rep is all 3 movements together. Begin by positioning your body close to the wall or chair. You'll want your knees bent at 90 degrees, as shown. If you're using a wall, press your feet into the wall and squeeze your glutes to lift yourself up into a bridge. If using a chair, drive the heels down.
  • Lower down with control, and extend your right leg up. Perform the bridge lift with only your left leg making contact with the wall or chair. Lower down and switch legs. Repeat on the other side.

6. Single Leg Squat and Forward Fold (10 each leg)

  • Stomp your right foot to engage it with the floor and feel how it contacts on all parts to help you find balance.
  • Lift your left leg in front of you, engage your core and hold onto the wall as you sit down into a single leg squat. Depth is not as important as maintaining and upright torso, keeping the core engaged and pressing through the heel to return to standing.
  • Without lowering your foot (if possible) sweep it behind you as you hinge forward at the hips, coming into a single leg forward fold. Keep a soft bend in the standing knee.
  • Complete all reps on your right leg before switching to the left.

7. Alternating Tabletop Lifts (10 each leg)

  • Sit down and place your hands by your hips. Dig your heels into the floor and lift up into reverse tabletop. Find your position, then we'll start alternating our legs.
  • Alternate lifting first the right leg by digging the left heel down. This fires up the hamstrings. Lower down and switch legs.

Thanks for being an action taker and doing this workout! Post below and let me know you stopped by – and if you liked this, be sure to use the share links to share it with a friend!


19

The post Booty and Legs Sculpting Circuit – No Equipment appeared first on Betty Rocker.

15-Minute Full Body Shred HIIT (no equipment)

$
0
0

Photo Jan 23, 2 46 47 PMAre you ready for an all-new Full-Body shred HIIT?

That’s a high intensity interval training workout, baby – and we are going to ROCK IT together!

I’m going to be doing this workout today against the clock, so get ready to sweat, burn and energize!

You can save this workout in your own Seconds Pro Timer App if you have it, that’s what I use so you can do this workout on the go.

For all of my rockstars who are being consistent with their workouts and perhaps a bit frustrated with their progress, the truth is that until you get as serious about your nutrition as you are about exercise you won’t see the real changes happen.

You cannot out-train a bad diet, no if’s, and’s or but’s.

When people write me to say “I’m eating clean! WHY isn’t it working?” My first question is, “Exactly what does clean eating mean to you?”

nutrient balanced eatingI used to call it eating clean myself, until I realized how many different ways there are to understand “clean eating.”

What you want to look at most is the nutrients you’re putting in your body.

Not the calories, not that you’re eating “fat free” yogurt or “low fat” peanut butter. Stop stressing about inaccurate calorie counts from a food label and an app that tells you you should eat 1300 calories a day.

Focus on the actual foods: the nutrients in them that you need should come from as close to all natural sources as possible.

Avoid the additives and extra sugars in pre-made foods as much as possible and try to make a few of your own home made meals each week.

What you need will vary day to day depending on your energy expenditure and so many other things.

Please read this awesome blog post to help you get started: The 5-Step Food Prep and Recipes Guide – and consider taking a look at how you are actually approaching your eating.

If you’re doing workouts like this, you MUST be giving your body adequate nutrients, along with enough rest and proper hydration.

If you want to maximize the effectiveness of the hard work you put into these workouts, take my advice and get your eating dialed in!

If you want support on this journey and to be able to ask me questions daily, get personal attention, a workout plan to follow and lots of buddies who are on the same journey, check out the Rock Your Life Membership Community!


Great job! Use the form tips below to help you and be sure to check in with me when you're done so I know you were here!

Full Body Shred HIIT

Format: 3 rounds, for prescribed time. Take rest as needed.

15 min hiitSquat thrusts (0:30)

  • Bend your knees and plant your hands on the ground beneath your shoulders. Jump your feet back, coming into a tall plank, core engaged, legs straight. Your back does not arch.
  • Jump your feet back to your hands, load the weight in your heels and jump up. Land softly, with a soft bend in your knees. Repeat.
  • Mod: Step your feet back rather than jumping. Perform a body squat rather than a jump.

Super Marios Right (0:30)

  • Begin standing, and step your left leg behind you coming into a reverse lunge. The knees are aligned with the toes.
  • As you come forward with the left leg, drive it up toward your chest, propelling yourself off the ground. Your right arm drives up into the air, reaching for Mario's gold coins.
  • Land softly on the right foot. Repeat.
  • Mod: Step back into a reverse lunge, and as you come up don't jump. Power your knee up to your chest. It's a great idea to hold onto the wall or chair back to aid in balancing. 

Super Marios Left (0:30)

  • Begin standing, and step your right leg behind you coming into a reverse lunge. The knees are aligned with the toes.
  • As you come forward with the right leg, drive it up toward your chest, propelling yourself off the ground. Your left arm drives up into the air, reaching for Mario's gold coins.
  • Land softly on the left foot. Repeat.
  • Mod: Step back into a reverse lunge, and as you come up don't jump. Power your knee up to your chest. It's a great idea to hold onto the wall or chair back to aid in balancing. 

V-Ups (0:30)

  • Lay on your back, and engage your lower back with the mat. Extend your arms and legs out straight.
  • Use your lower abdominal strength to lift you up into a V-shape, reaching your hands to meet your feet. As you come back down, re-engage your lower back with the mat.
  • Mod: Knee Ups are an awesome variation to use if you're building strength or need a break. Bend your knees as you lift up to take the full weight of your legs out of the move and allow you to get stronger.

Tuck Jumps (0:30)

  • Begin standing. Jump and drive your knees up toward your chest. I like to keep my hands at hip height to act as a focal point of where to aim for.
  • As you come down, keep a soft bend in your knees and land lightly. This helps protect your joints and also adds an additional deceleration challenge to the move.
  • Mod: Take the jump out and work on body squats. Keep the weight back in your heels and keep your chest lifting. You can try jump squats also as you begin to progress in strength. Land lightly on your feet.

2 way push ups (0:30)

  • Come into a tall plank, hands beneath your shoulders, legs straight. Keep your back flat, don't let it arch.
  • Perform a push up. As you come back to tall plank, walk your hands out wide and perform a wide push up. Keep your core engaged, belly button hugging in and up towards your spine.
  • Mod: Perform the 2-way push up kneeling, paying good attention to your back and core.

Alternating Reverse Curtsy to Kick (0:45)

  • Stand and step your left foot back into a reverse curtsy lunge meaning that your left knee will end up behind your right heel as opposed to straight back.
  • As you come forward again, kick your left foot up high.
  • Step down and step your right foot behind you into a curtsy lunge on the other leg. Step forward into a kick. Repeat.
  • Mod: Hold onto a chair back or wall for support and balance. Instead of kicking, try driving your knee up.

Be sure to check in below and let me know how you do! It's great to see you!

Share this workout with a buddy who loves to workout and is short on time!

21

The post 15-Minute Full Body Shred HIIT (no equipment) appeared first on Betty Rocker.

4-Minute Abs

$
0
0

Photo Feb 24, 13 29 55Are you excited to get a killer ab workout in 4 minutes? Awesome, me too!

Sometimes you have to just make the most of the time  you have – and that’s how I snuck this bonus ab workout in.

(BTW to my ladies who are wondering – this swimsuit is a reversible one from L Space)

I was visiting my friend Drew last week in San Diego (he makes Organifi, that delicious green juice powder I use a lot) and after our morning workout we decided to grab some sun!

Never one to miss an opportunity to #stopdropandbettyrock, I was like, hey Drew, check out these awesome core moves lol!

You can knock out this circuit while you’re doing anything….chatting to a friend, talking on the phone, watching a show, or just add it on to the end of any full body workout!

Use my Hot Abs Workout Guide for more awesome core strengthening workouts you can do, and be sure to check in in the comments below and let me know when you do this workout!


4-Minute Abs Workout Format and Tips

In the video, I go through a series of all moves in about 4 minutes. I've added a couple additional sequences you could make out of these below with a specific rep count. 

4-minute abs1. Knee Ups

  • Lay on your back, arms extended. Engage your core and press your lower back down into the mat. Lift your torso and knees up together, meeting in the center. Extend out and repeat.

2. Boat Pose Hold

  • Hold your legs up in a V, arms by your sides. For advanced, raise your arms up overhead. To build to this move, bend your knees and balance on your sit bones, holding the position and breathing evenly.

3. Upright Bicycles

  • Balance on your sit bones, arms at your sides for balance. Begin by drawing one knee in to your chest, extending the other straight. Raise your arms overhead to add an additional challenge. To take this down a notch, lay on your back and work on these with your back resting on the ground.

4. Leg Float - low, then lifted (both sides)

  • Lay on your back, core engaged, right knee bent, left leg extended. Lift your left leg up straight with a flat foot to 90 degrees. At the top, point the toe and bring the leg back down with control. Don't make contact with the floor, float the leg right back up. Lift up into a single leg bridge, pressing down into your right heel. Continue to float the leg as before, keeping the hips lifted and square (not rotating side to side). Repeat the sequence on the other leg.

5. 3-Way Down Dog

  • Come into tall plank, hands stacked below your shoulders, core engaged. Press back into a downward dog. Float your left leg high and as you come forward to tall plank, bring it to the outside of your left elbow. Press back into down dog, sweeping the leg up again. As you float forward, bring it under your body toward your nose. Float back to down dog, and as you come forward again, bring it under and across toward your right elbow. Repeat on this side for desired reps, then switch to the other leg.

6. Butterfly Scissor Kick Sequence 

  • Lay on your back, pressing your lower back into the mat and engaging your core. Lift your upper body up slightly to add a little more challenge and further engage your core. Point the toes and begin to alternate lifting them up and down to about 45 degrees, never touching them down. Switch to scissors (without touching down if you can) crossing your left leg over your right, alternating in this 45 degree position. Place your hands behind your head and neck to support you. Come back to the butterfly kicks, this time widening them (it's easier this way, and as you fatigue it will make it easier to squeeze those last few in). Come back to a final few scissors.

7. Full Roll Ups

  • Lay on your back, extending arms and legs. Engage your core, and use your abdominal strength to sit up, diving forward toward your feet, allowing your body to come into a C-shape. Roll back slowly with control and repeat. Bend your knees for a little help with this move.

8. Straight Leg Lifts

  • Lift your torso up slightly, placing your hands behind your head to support yourself as needed. Straighten your legs, and lift them up to 90 degrees, lifting your hips slightly. Lower the legs slowly to 45 degrees, then come back up into the hip lift. This move can also be performed with the knees bent to build strength in the lower abs.

9. Alternating Straight Leg Lifts

  • I just add a quick set of these to the end of the straight leg lifts to get a tiny more out of this move when I start to fatigue. Take the lift out, and just lift one leg up, then the other while keeping the non-lifting leg hovering.

10. Toe Reaches

  • Lift your legs to 90 degrees and engage your core. With control, lift your upper body up, reaching for your toes. Use a hand behind your head to support you if your neck gets tired. 

Try any of these bonus sequences once you have learned the moves! You can do the workout with me in just 4 minutes, doing a short version of each of the 10, or break it up into any of the following shorter sequences with more reps.

Do 3 rounds of any of the following:

Bonus Sequence 1: 

  • 15 Knee-Ups
  • 10 (each side) 3 way Down Dog
  • 10 each Butterfly Scissor Kick Sequence

Bonus Sequence 2:

  • 0:30 Boat Pose Hold
  • 12 each side Upright Bicycles
  • 20 each side Leg Float (5 down, 15 up)
  • 10 each side Straight Leg Lifts

Bonus Sequence 3:

  • 15 Full Roll Ups
  • 15 Straight Leg Lifts
  • 15 Toe Reaches 

Be sure to check in below and let me know when you do your workout, and any questions you have! Share this post so your friends can try it too!


Click Here to Get My BEST Abs Workouts! 


Challenge Pages Ad for Abs

The post 4-Minute Abs appeared first on Betty Rocker.

5 Quick Fat Burning Home Workouts (No Equipment)

$
0
0

#noexcusesWhat’s up Rockstar! So I was traveling for the past week and was totally determined to get my workouts in on the road! 

The following 5 workouts will give you an awesome variety of moves and circuits to do in almost any small space – including on the stairs!

Sometimes it’s easy to want to just skip your workout because you feel like you don’t have enough time, the right clothes, or the right space or set up, but I promise you, with these 5 circuits in your arsenal, you can #stopdropandbettyrock anytime, anyplace and keep on top of the #1 most important key in getting – and staying fit and healthy: CONSISTENCY!

It is far better to do SOME movement than none at all – trust me I know how easy it is to get focused on a project, work all day, have weird timing with eating and feel like there just isn’t enough time to do a “real” workout – but these short, fast workouts are incredibly effective, will make you sweat and will empower you to make the most of any situation you’re in.

Toys on the stairs? Make a game out of jumping up the stairs picking them up using workout 5. Girls want to play ballerina? Perfect, get them to do some of the moves from workout 2 with you.

In a tiny hotel room space? Use the hallway workout from workout 1. Spending too much time in front of the TV? No worries…add in the moves from the un-couch potato workout 3 – and notice who else is watching YOU and not the TV! Combine workouts 4 & 5 for an extra burn!

PRO TIP: Program these moves into you Seconds Pro timer app in your phone so you can save them to do anytime!

1: Hallway Workout


Limited space and limited time? No problem!! Get on these 4 moves you can do in a hallway...
‪#‎noequipment‬ needed!!

4 rounds:

1. Lateral Shuffles (0:45)
-stay low, keep the weight back in your hips and heels, keep your chest up

2. Wall Push Up Claps (15)
-keep your core tight - don't let your back arch - try this kneeling in front of an ottoman if you're building up strength

3. Controlled Paused Squats (15)
-slow and controlled with a micro pause at the bottom. I like doing this in front of a wall holding my hands out as shown to keep my weight back and my chest up. It's easy to lose your form with these. Squeeze your glutes as you come back up!

4. Wide Narrow Jump Burpees (10)
strong burpees, drop it down, push up, keeping your core engaged and jump landing in a sumo or wide leg squat. Jump again landing in a regular squat and let that carry you back to your next burpee

Do it on a break at work also a great one for a hotel or if you're home doing chores - you can rock out some sets between your tasks!!


2: Countertop Ballet Booty Barre


Counter top BALLET BOOTY BARRE workout - you can do this anywhere, anytime - I had very limited space between the countertop and the couch but was still able to get some seriously awesome moves in - ‪#‎noexcuses‬!

5 rounds:

1.Squats on your toes - 20
- (drop it down if this bothers your knees) keep your weight back in your heels, chest up.

2. Releve plies (20)
- heels together up on your toes - knees out

3. Reverse curtsy to lift (15 each leg)
- keep your chest up and hold onto a chairback for stability as needed

4. Second position plié squats (20)
- wide leg like sumo stance - keep your chest up, core engaged, booty back

5. Leg lifts (20 each leg)
- don't strain your back with this one, it's a small pulsing lift. bend forward to make it easier.

6. Knee to nose tuck, extend back (10 each side)
- totally awesome core and booty move, lift up on your toe as you drive your knee to your nose, come down to your heel as you sweep the leg out into an extension.

BONUS - add a hop


3: UN-Couch Potato Workout 


Did this in the morning even though I was feeling super lazy and wanted to stay in bed, I was SO glad I did it, because I told myself I'd just do one round, but after the first one I kept going. Does that ever happen to you?

I had so much energy when I was done!!

Try this for 3 rounds and tell me how YOU feel!!

1.0:45 - Mountain Climbers
- keep your core engaged, don't let your back arch

2. 10 each side Single Leg Bridge Lifts (elevated)
- press down through the heel and keep your pelvis nice and level (don't let it roll to one side or the other)

3. 10 Elevated Push Ups (alternating leg lifts for extra challenge)
-float the leg for extra challenge!

4. 12 Triceps Dips
- keep your chest open, shoulders back and those elbows parallel

5. 15 each leg Single Leg Thrusters
- press down through your heel to really activate your booty and squeeze it each time you come up


4: Full Body Sculpt


Try this FULL BODYsculpt circuit you can do ANYWHERE - I knocked this one out in a hotel room - it will take less than 15 minutes:

Go for 4-5 rounds:

1. Single leg split squats (0:45 each leg)
- press through the heel, keep your chest up and feel the booty burn!

2. Triceps Dips with leg elevated (0:45)
- alternate the leg lift every 5 reps to distract yourself and go as long as you can

3. Plie Pulse (1:00)
- lift up on your toes, heels together and drop down, move the thighs in and out - this is a killer thigh burn that gets your calves too

4. Elevated Push Ups with alternating leg lifts (0:45)
- a great way to build strength in the chest and get stronger for push ups on your toes on the floor is elevated push ups. Adding the leg lift makes them just a tiny bit harder!


5: Stair Workout


"Ambition is the first step to success. The second step is action."

Who is taking the STEPS with me in this Booty and Leg Defining Workout - you can do on your lunch break outside or on your basement stairs - and get a little bonus upper body in there if you have a railing!

3-4 rounds

1. Staggered Side Step up Pulses: (1:00)
- step up laterally then squat, repeat up the stairs. Same thing coming down same leg leads. At the bottom turn around and go up facing the other direction and back down the same way.

2. Stair Lunge and Lift (1:00)
- step up the stairs coming into a lunge. As you stand lift the lower leg up behind you into a lift. Repeat!

3. Hanging Row (optional, bonus!) (0:45)
- switch your body position to face the other way every other set if you have a gradiated railing so you can do staggered rows working both sides evenly - keep your core engaged and squeeze between the shoulderblades.

4. Climbing Jump Squats (1:00)
Jump squat up the stairs - when you get to the top run down and do it again til your time is up!

5. Mountain Climbers (0:30) not shown - at the completion of each stair move do 0:30 of mountain climbers - so do move 1 then move 5, move 2 then move 5, move 3 then 5 etc for a total body burn!!

Be sure to check in and let me know when you get one of these done! Post on my Facebook or leave a comment down below!


22

The post 5 Quick Fat Burning Home Workouts (No Equipment) appeared first on Betty Rocker.


Cross Country Road Trip Full Body Shred

$
0
0

road trip workout pinterestI made it to San Diego! I’m so excited to be in my new home. It was about a 15 hour drive, and I went through 4 states – Colorado, Utah, Nevada and finally California. Do you live in one of them? 

Whether you’re driving or sitting at a desk, sitting for long periods of time is tough on the body. To keep myself energized and get a workout in, I did this awesome full body circuit on my stops and filmed it so you could do it too!

The wind was a little nuts at one of my stops, sorry about the less than perfect quality of the audio!

I decided that even though the conditions weren’t “perfect” I could still put my best effort in – and I was so glad I did. That’s kind of a theme that shows up for me in a lot of situations where I used to hold myself back. 

With my type A personality I would put a lot of pressure on myself to get it “right” to memorize “everything” to know it “all” or to make it “perfect.” But 9 times out of 10 I ended up miserable and stressed out and not getting nearly as much accomplished. Can you relate to that at all?

When you get to that part of the video, laugh along with me while I was watching it back and know that we’re ALL doing the best we can with the circumstances we have. You’re amazing, exactly where you are. Make today count and don’t hold back on going after what you want even if things don’t seem perfect.

Be sure to leave me a comment below to let me know you did this workout, where YOU live, and say hi if I went through your state! 

Join me and the members from across the country and around the world in my online fitness community with weekly workout programming, live streaming weekly home workouts, and tons of support and motivation so I can spend more time helping you reach your goals!


Check out the Rock Your Life Online Fitness Community HERE!

Cross Country Road Trip Full Body Shred

You can do this workout for time on your own or you can do it with the video. To do it for time, you can choose either 0:30, 0:45 or 1:00 rounds depending on how much time you have and how difficult you want it to be. One thing of note, the first move I would do 2 rounds of, as in 0:30 each leg rather than dividing it up.  Most challenging and longest is going to be 1:00, intermediate 0:45, beginner or short on time - 0:30 will be perfect. 

1: Single Leg Split Squats

  • Position your right leg behind you on a box, bench, stair, couch or any elevated surface.
  • Keep your core engaged and chest lifted as you squat and press up through your heel each time.
  • Watch your knee alignment, it should be lined up with your front toe, and if your torso is upright you'll be able to keep it just over or slightly behind your big toe. Be sure to do both legs.

2: Jump Squats

  • Stand with your feet hip distance apart, core engaged.
  • Shoot your booty back behind you, keeping your chest up (don't bend forward) and weight back in your heels.
  • Use your glutes to power up to a jump. Land lightly, with a soft bend in your knees.
  • You can take the jump out and modify the jump squat with a full body extension, shooting your butt back behind you, hands come down to touch the side of your calves or reach for your feet. As you press up to stand, raise your arms up overhead.

3. Elevated Push Ups (clap optional)

  • Position yourself in a plank with your hands on a box, couch, bench or any elevated surface.
  • Keep your core engaged - don't arch your back.
  • Lower your chest down and press up and away. If you want to add the dynamic clap, be sure to really work to keep your core engagement.
  • Great mods for the elevated push up are to do it on your knees, or against the wall.

4. Split Squat Jumps

  • Position yourself in a forward lunge, with your knees lined up with your toes, chest up, core engaged.
  • Jump into the air, landing in a forward lunge with the opposite leg leading. Land lightly, and use your arms to propel you.
  • You can take the jump out if you need to modify this, and do alternating forward lunges. Always feel free to hold onto the wall or a chair back to stabilize you in these single leg moves!

5. Cross Cross Squats

  • Stand in your same position you started your jump squats in.
  • Bring your arms up behind your head and engage your core.
  • Shoot your booty back behind you, keeping your weight back in your heels and chest up.
  • As you press up to stand, drive your right knee up to your chest and rotate your torso, bringing your left elbow to meet your right knee.
  • Repeat with the left leg and right elbow. Squat again and repeat the cycle.

6. Triceps Dips

  • Use your bench or elevated surface and position yourself in a reverse tabletop with your hands behind you.
  • It's very important to open through your chest in this position, squeezing your shoulder blades together to keep you shoulders positioned properly.
  • Lower slowly with control, then press up and away - focusing on the press to really activate the triceps. Keep your elbows parallel to one another - don't let them fall out to the sides.
  • A great modification for this move is to stand or kneel holding a weight or water bottle overhead. Lower it down toward your upper back, keeping your elbows hugging in parallel to each other. 

I'm looking forward to hearing from you, so be sure to comment below! I'll be spending the next week or so getting set up in my new place and enjoying the beach!


Check out the Rock Your Life Online Fitness Community HERE!


Thanks for watching and working out with me, hope you have an awesome day!


22

The post Cross Country Road Trip Full Body Shred appeared first on Betty Rocker.

Tabata Abs: Afterburn Shred

$
0
0

Photo Mar 31, 2 30 40 PMSpring is here! Let’s start this month off right together with an awesome workout for our core that will strengthen and define the abs…

Tabatas are a super efficient (4 minute) way to get an awesome cardio burn in a short time.

I like to stack 3 of them together in what I call “Endurance Tabatas” and in today’s workout, we’ll be focusing on moves that really strengthen and shred our core – targeting the abs from all directions!

If you’re in the Rock Your Life Program (my online fitness community and workout program) this is Workout 1 of the Spring 30-Day Challenge – and if you’re not a member, you can get all the details about it right here!

Make the most of today’s workout whether you’re doing the challenge or just joining me today for this workout – and give it 100% effort for maximum results.

Check in below to let me know you did this today, and what your goals are for yourself this month!


Tabata Abs Workout Format and Tips

Format: Tabatas are formatted with 0:20 work, followed by 0:10 rest for a total of 4 minutes. Follow along with the video, or feel free to program your own workouts using this format! I use the Seconds Pro timer app to save my workouts!

ab shred tabata stackTabata A

Move 1: Jump Ins

  • Come into a tall plank, hands stacked below your shoulders belly button in and up - no arched back.
  • Legs should be straight and strong.
  • Jump your feet in toward your hands, keeping your hips low and core engaged.
  • Mod: Instead of jumping, walk or run your feet in as mountain climbers, which targets the same muscles with less intensity, or stand and take the pressure off your hands and run your knees up to your hands.

Move 2: Knee Ups

  • Lay on your back with arms and legs extended.
  • Make sure your lower back makes contact with the mat or floor.
  • Using your lower abdominals, sweep your hands up and to the sides as you sit up, bringing your bent knees up toward your chest at the same time.
  • Lower back down to the starting position with control and repeat.
  • Mod: Lay on your back and keep your upper body on the mat as you lift and lower your knees. Keep your lower back engaged with the floor or mat. Add an upper body crunch to add a little more challenge.

Tabata B

Move 1: Jumping Cross Cross Squat

  • Stand with feet slightly wider than hip distance apart.
  • Engage your core and shoot your booty back behind you as though you were going to sit on a chair - keeping the weight in your heels and chest up.
  • Drive your heels down to power up to jump, landing lightly on your feet.
  • As you land, drive your right knee up and across your midline, rotating your torso as you bring your left elbow to meet your knee. Repeat on the other leg, then back to the squat.
  • Mod: Take the jump out to lessen the impact, instead performing a body squat with good form. Only squat as deeply as you can comfortably go without bending forward at the waist.

Move 2: Side Plank Dip to Crunch

  • Come into a side plank on your elbow, with your shoulder and elbow lined up.
  • You can either drop the knee down or come into a full side plank up on your feet. I like to scissor my feet (one behind the other) for better balance.
  • Keep your hips square to the wall in front of you and drop your hip down to the floor, then drive it back up to start, bringing the top knee up to a side crunch to meet your elbow.
  • Mod: Keep the knee down and take out the crunch, working instead on the hip dip to lift.

Tabata C

Move 1: Elevated Spiderman Climber

  • Get your feet up on your couch or ottoman or any elevated surface.
  • Hold a plank, belly button in and up. Make sure your hands are stacked below your shoulders and your back is not arched.
  • Bring your right knee to your right elbow then place it back down. Repeat on the left and continue, maintaining a strong plank alignment.
  • Mod: Perform the same movement without the elevation, right on the floor beginning in a tall plank. This also works great from a kneeling position as demonstrated.

Move 2: Elevated Straight Leg Lifts

  • Position your body on the couch, chair or ottoman with your hands behind you to assist your balance when you lean back.
  • Let your legs come out straight, and be sure your core is engaged.
  • Lower your legs and lean back. As you lift them, bring your torso up to meet them. You may also do this same movement with bent knees.
  • Mod: Perform the move on the floor with either straight or bent legs.

GREAT JOB on today's workout! Don't forget to check in below and let me know how you did - I'm looking forward to hearing from you!

Remember, a healthy body is built on the fuel you put in it as well as the way you train, so make sure you're focused on getting the good quality nutrients and foods your body deserves to perform and look its best! 


Check out the Rock Your Life Online Fitness Community and the Spring Challenge HERE!


Thanks for working out with me - remember to treat yourself like the AWESOME person you are!

 21


The post Tabata Abs: Afterburn Shred appeared first on Betty Rocker.

Low Impact Abs and Booty Home Workout

$
0
0

Photo Apr 17, 9 09 14 PMI know we do a lot of high intensity workouts together, so today I wanted to slow things down and show you another style I use to train that really fires up the intrinsic stabilizing muscles of the hips, butt and core – those muscles that support our posture, alignment AND sculpt those dangerous curves :)

You can do this at home with a couple jars of peanut butter (or coconut oil, or light dumbbells) for props like I am – I had to eat some to even out the jar weight LOL. You’ll want an ottoman or bench handy as well for some of the elevated moves.

Doing low-impact workouts doesn’t mean low intensity – there are many ways to turn up the heat. I was sweating just halfway through this sequence, and you’ll definitely find it challenging at any fitness level.

I’ve got modifications in there for you so you can build strength in your body – be where you are at, and remember that giving it the best you’ve got is just right!

Time Stamp - Workout Begins: 2:30 if you'd like to repeat it & skip the warmup

Special thanks to my friend Cassey Ho from Blogilates for my gorgeous Spring Yoga mat!


Low Impact Abs + Booty Workout

Move 1: Bent Knee In & Outs (10)

  • Come to a seated position on your tailbone with your hands behind you.
  • Engage your abdominals as you lean back slightly and lift your knees to chest level.
  • Extend your legs out straight, then draw the knees back into your chest.

Move 2: Straight Leg Lifts (15)

  • Continue with move 1, or straighten your legs for this more challenging variation.
  • Straighten the legs and lean back, lowering them while keeping your core engaged.
  • Draw your legs up as you lift your torso. Use your hands to stabilize you.

low impact booty and abs pinterest
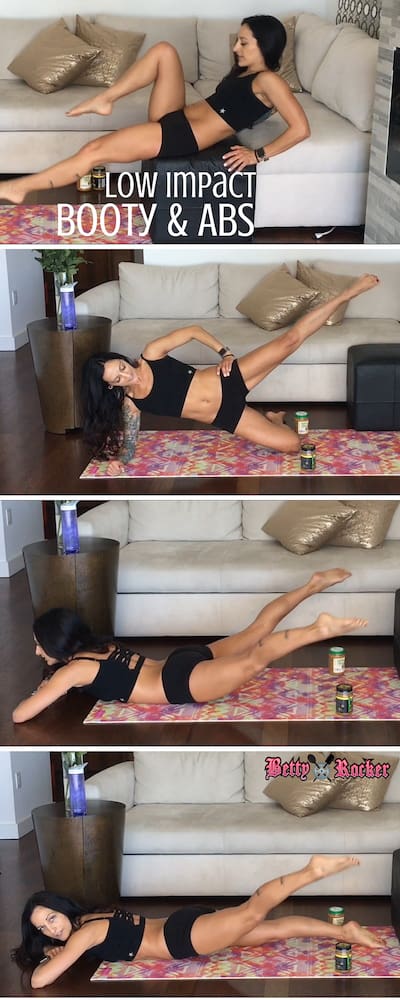
Move 3: Elevated Bridge Lift with Biceps Curls (10 each, then 15 together)

  • Part 1: Grab your weighted objects and lay on your back. Draw your shoulders down and back so they're touching the mat. Notice how this opens your chest. From this position, curl your weights up to your shoulders into bicep curls.
  • Note: Make sure to keep your shoulder blades engaged by squeezing your shoulder blades together and keeping your shoulders relaxed and lowered. Allow there to be as much space as possible between your ears and shoulders. This prevents you from doing bicep curls in a shoulder forward position.
  • Part 2: Position yourself in front of your box or ottoman, and place your heels on it. Drive down through the heels to lift yourself up, squeezing your butt and core.
  • Modification: keep your feet on the floor, press your weight into your heels, lift your booty and engage your core.
  • Part 1 and 2 together: Drive the heels down to lift your hips as you simultaneously curl the arms. Lower down with control.

Move 4: Prone Lateral Lift and Raise - isolated (20 each leg)

  • Place your objects on either side of your mat, close to the bottom.
  • Position yourself on your stomach with your legs inside your objects, at about calf height. Engage your core.
  • Lift your right leg up, engaging your glute and clear your object, bringing it over and to the right. Repeat back to center. Repeat with the left leg. Continue alternating legs.
  • If you are comfortable, you can bring your wrists down to the floor crossed in front of you and lay your head down on your wrists while you alternate this move one leg at a time.
  • As you continue alternating, focusing on each lift over the weighted object, feeling the squeeze. Try reaching further out with your legs as you get comfortable with the movement.
  • It's super important to keep your core gently engaged and to stop if you feel a strain in your lower back at all.

Move 5: Prone Lateral Lift and Raise - together (20)

  • Stay in the same position (prone - or on your stomach) and lift your legs at the same time over your objects and out to the sides.
  • Do this smooth and controlled and keep your core engaged.

Move 6: Side Plank Ab and Booty Combo

  • A: Leg Lifts (15) Come onto your right side, stacking your elbow below your shoulder and bottom knee down. Square your hips in front of you and begin lifting and lowering your top leg in a smooth motion. 
  • B: Forward Taps (10) From the same position, begin tapping your top leg in front of you, then return to start. Maintain a stable torso and strong, engaged core throughout this movement.
  • C: Hip Dip (10) Straighten the top leg and hold it stable as you drop and raise your bottom hip to touch the mat.
  • D: Hip Dip to Raise (10) Lower the hip and as you press it back up, lift the top leg. Maintain a stable pelvis.
  • E: Hip Dip to Raise and Tap (10) Lower the hip and as you press back up, tap the foot forward and then back to start.

Move 7: Sumo Squat Jumps (20)

  • Stand with your feet out wider than hip distance. Engage your core and position a box or ottoman behind you.
  • Keep the weight back in your heels and squat down, allowing your knees to track over your toes and keeping your chest up.
  • Engage your booty to come back up into a jump. Land lightly with a soft bend in the knees to repeat.
  • Take the jump out of this to keep the workout entirely no impact. Do sumo body squats instead. 

Move 8: Elevated Scissors (20)

  • Come back onto your box and reposition yourself like you did in Move 1.
  • You can take the variation I show you first in the video where you bend your knees and do alternating knee ins, or you can straighten the legs and do straight leg raises up and down.
  • Be sure to keep your core engaged to protect your back.

Pre and Post Workout Eating...

nutrient balanced eatingJust a note about peanut butter and healthy fat in general - and when I eat it, since I ended this video with me stuffing a giant spoonful of peanut butter in my mouth haha :)

There is a lot of random and mixed information floating around about pre and post workout nutrition.

While many supplement companies and fitness magazine ads would love you to spend money on pre and post workout drinks, they're just packaged versions of the same things you can get from the whole food meals you're spending your money grocery shopping for. So don't get bamboozled into thinking you need a bunch of fancy stuff.

The bottom line is it's way more important to be eating healthy, whole foods and balancing your nutrient intake consistently than it is to worry about perfect meal timing unless you're a pro athlete.

This is one of the best articles about pre, during and post workout nutrition in my opinion if you want to dig in a little deeper from a reliable source.

Here's what I do...

I don't generally include fat post-workout, as I don't want it to slow down the delivery of carbs to replenish muscle glycogen stores or the amino acid pool. Fat has the important job of slowing down how fast nutrients get absorbed, which serves an important role in keeping our blood sugar stable and helping us feel full - but just after a workout I want the opposite effect.

I'll often make a green smoothie right after my workout with a scoop of wholesome protein powder (you can check out my top protein powder picks in all categories here), a big handful of greens, some almond milk and fruit.

Since that's a pretty small portion of nutrients, I'll be hungry for a fuller meal 45 minutes to an hour later, at which point I'll enjoy something like chicken, turkey or fish with some quinoa and pesto and avocado. Or I'll just eat that meal after my workout, depending on what's going on.

I tend to eat a small meal or just workout an hour or so after I've eaten a normal meal rather than having a "pre-workout." It really just depends on what is going on in my day, like if I'm starting to get hungry but I know I want to work out within the hour, I'll make a smoothie similar to that one above, but I'll add a scoop of nut butter to it. A little fat prior to my workout just gives me more brain power. 

Here's a great interview I did with 2 other awesome women trainers, where we go over some of our top strategies when it comes to training - we're talking about weight training in this article, but the nutrition questions we covered relate to all training styles. 

Hope you enjoyed today's workout! Be sure to leave me a note below to let me know you did it!


22

The post Low Impact Abs and Booty Home Workout appeared first on Betty Rocker.

Building a Balanced Physique and Protecting Your Joints

$
0
0

balanced physiqueOur bodies are composed of many supporting systems, but let’s focus on two that have the most effect on movement: the skeletal and muscular systems.

The body is simultaneously one of the most complex and the most simple machines in existence: how we treat it 100% determines how it functions.

Like a building, the body is made up of interlocking support structures. Your skeleton is very much like the framework that outlines the shape of a building, and your muscles are the wood and building material arranged in a specific pattern to contribute to the soundness of the entire structure. What’s extra cool about the building that is our body is its unique ability to move in so many different ways. 

The intrinsic connection of the two body systems, muscle and bone, determine your ability to move. But it’s the balance of the muscles around the skeleton that determine how.

It seems like there is this giant void in the understanding we have of our own bodies. And it’s not necessarily our fault! We get classes in school about the geography of the earth, but not the geography of the body. That’s reserved for “specialized training.”

But I think everyone needs to know a few basic things to avoid and prevent pain, and to make the connection that how we treat our body every day – from the food we eat to the way we train – has an impact on how the body looks, performs and on how long it lasts.

Our bodies were designed for function.

muscle stretch

We see in front of ourselves and therefore most of the movements we make are in a forward direction. There are specific muscles that work over and over in your daily activities that end up developing more than their opposites, the muscles that counterbalance them around our joints.

Think about how you sit at the computer, how you sit to eat, how you drive, that you walk and bicycle forward and on and on.

Over time repetitive motion takes its toll. We’ve all seen the propensity many elderly people have to lean forward, hunch over and have a head way forward from their center of gravity. This is because they have been using the SAME muscles so much without the balance of using the opposite muscles, their overworking muscles are literally pulling their bones forward.

What we may not realize is that most of us are part of the way towards that already.

FHP collage

There is nothing wrong with any of the above activities – in fact, I want you to be able to enjoy every single one of them in abundance.

What I want you to notice is the similarity in each of those common postures, and think about the way you move every day that uses the same muscle groups over and over.

When a muscle works, it contracts. Imagine your bicep doing a curl, every time it comes up, it contracts.

If all you did all day long every day was bicep curls, eventually the muscle wouldn’t be able to come out of the contraction.

It wouldn’t be able to grow any more either, and would stay stuck in a semi-contracted state all the time.

It would pull on the bones that it was attached to, your lower and upper arm bones, causing your arm to stay flexed all the time.

If however, we were to simultaneously train the opposite muscle to the bicep – which is the tricep…

biceps and triceps

…we would create a nicely balanced arm that flexed and extended and was equally strong on both sides.

Have you ever been at the gym and seen those extreme bodybuilders whose arms don’t fully extend? Who sort of walk around looking like bulls?  There is a propensity in a sector of the uneducated and purely aesthetic focused fitness population that wants only to train the “vanity” muscles of the chest and biceps.

This is an extreme example, but if you can picture that you know that overdevelopment of these specific muscles pulls the elbow joint into extension and the shoulder joint into forward rotation. You might be getting stuck in a position due to overuse at your job or sport, and not even realize it.

While it’s easy to see how an imbalance could happen between the bicep and tricep, what actually happens more often are imbalances between the front and back of your body, or the right and left side.

Modern life subjects us to many misalignment issues, repetitive motion injuries and stress around joints that we don’t realize is there until something gives way.

We don’t always use opposing muscles in a balanced way.

Often some muscles get overused, and others underused leading to strained backs, unsteady knees and other types of joint pain that over time can cause big problems.

So what is the answer? How do we solve this problem without having to take medication for pain (which I personally think simply addresses the symptom, and doesn’t fix the problem)?

The simplest thing you can do RIGHT NOW is to become aware of your body postures and daily activity positions and think about what the opposite movement to them would be.

For example, a lot of the pushing moves or arms in front of you moves have an opposing pulling move that would work the opposite muscle group. But we don’t do them nearly as often.

That’s why it’s SO important to add moves like rows, reverse flyes, superman lifts, swimmers and more into your routine more than you would in a normal “balanced” exercise plan might include. You have to be responsible for thinking about what else you’re doing so you can tweak your program a little to bring your body into balance around your daily activities.

1. If you take the time to exercise, think about exercising the side of your body that doesn’t get used as much during your daily activities. 

I’ll give you a clue – it’s not your chest! The back muscles are the most neglected muscles in the body, and can have the most benefit in improving posture and decreasing pain.

Here are some excellent articles from the blog to help you strengthen these often weak areas of the upper body, which can show up as wrist or shoulder pain, or as upper mid back pain (I have “knots” in my shoulders!):

2. Think about sitting upright and engaging your core and back muscles while you’re sitting all day. 

Make sure you adjust your desk so the height allows your head to view the computer screen without having to tilt forward.

3. When you train for a specific activity you enjoy, consider cross training the muscles that you don’t use as much for your sport.

If you’re a cyclist, think about what muscles you use to perform that repetitive exercise day after day. It’s a lot more quad than it is hamstring. Do some exercises that engage your hamstrings on your days off. Unless you’re competing and under the care of a coach, I’d highly recommend you train for balance in your legs as well as performance in your rides. Your body will thank you in the long run.

 If you’re a runner, consider taking a few spin classes or doing some squats to work your quadriceps muscles. Runners get a lot of development in their hamstrings and gluteal muscles.

4. Seek the care of a Physical Therapist, a Manual Therapist, an Occupational Therapist, or Sports Massage Therapist specializing in neuromuscular and trigger point therapy, or another kind of practitioner who is acquainted with alignment of the body if you are experiencing pain or discomfort while training. Some discomfort is normal – exercise isn’t supposed to always be “easy” haha :) But actual pain needs to be addressed. 

Training on poorly balanced and poorly aligned joints will inevitably lead to injury. 

For further reading:


Train for balance, and strength will be inevitable.


All of my programs are designed for function AND aesthetics. Take advantage of awesome home workout programming and meal planning made easy - to fit any budget.

19

The post Building a Balanced Physique and Protecting Your Joints appeared first on Betty Rocker.

Low-Impact Core Slider Home Workout

$
0
0

Photo May 04, 3 36 58 PMJust a couple weeks ago, we did a really effective low-impact booty-focused home workout and I know a LOT of you really like the variety between the high impact and the low impact so I wanted to make another one with the same theme!

You really can get amazing results in a short-duration workout when the intensity of your workout is high.

We can up the intensity in our workouts a couple different ways – one with a faster, more dynamic style (like plyometrics, tabatas and HIIT circuits) that get our heart rates up and blood pumping –  and also workouts like today’s where the intensity comes from the resistance and recruitment of many stabilizing and balancing muscles.

There are a lot of great ways to do resistance training like using weights, bands, a slider – or even as simple as using gravity to your advantage, which I do in so many of my bodyweight workouts. I alternate the short, effective workouts I do between a more plyometrics style and resistance style so I don’t get burned out – plus I love the variety!

Today we’re going to be using gravity and our sliders to add that resistance-intensity to our training – with this core-focused workout that you can do in about 12 minutes with me (or repeat for a longer workout of course) to really make the most of our time and get stronger!

Leave me a comment to let me know you were here, and how you did in today’s workout! There are notes on form written below for you, as well as some info about nutrition to help you get the most out of your training.

to repeat the workout, jump back to 1:21


To really see the hard work I put into my workouts pay off, I make it a PRIORITY to focus on getting balanced nutrition.

What nutrients does your body need to make the most of YOUR hard work and the time you're putting into your training?

You need....

nutrient balanced eating 3Protein: Eating protein is not going to “bulk you up.” It’s an important nutrient that’s responsible for multiple body functions. It is even more satiating than fat or carbs, and it can boost your metabolic rate while lowering your appetite.

If you're constantly craving sugar or sweets, it is important to take a look at the nutrients in your daily dietary intake to see if you're getting enough protein, fat and complex, wholesome carbohydrates.

Carbs: I do not recommend a no-carb or low carb diet for any length of time. Long term carbohydrate deprivation leads to a complete depletion of your body’s storage glycogen levels, depression of your immune system, decrease in metabolic function, and a host of other issues.

Making your baseline a good variety of complex and simple carbohydrate foods provides your body with the nutrients, vitamins, and fiber it needs without spiking your blood sugar or overloading your liver. I'm talking about easy stuff like quinoa, brown rice, and baked sweet potatoes, sprouted grain bread and overnight oatmeal. Fruit is a wonderful quick-digesting "simple" carbohydrate, but will not give you the same long-lasting energy as oatmeal for example - so go for variety.

Keep in mind that soaking, sprouting, or fermenting grains is always the best preparation method that breaks down the protective outer coating of the grain and the gluten protein, and allows your body to get their full nutritional benefit.

Fats: Fat is the preferred fuel of muscle tissue at rest (make sure you get plenty of sleep to maximize this benefit), AND it protects your muscle's valuable protein stores while being burned for energy along with glucose and glycogen during exercise.

Eating fat provides your body with the means to absorb the micro-nutrients in foods like vegetables and greens - by shuttling and dissolving their fat-soluble vitamins and phytochemicals to your cells. It is a powerful ally in optimal health.

Greens: Aside from cooking greens and harnessing all their wonderful fiber that helps our digestion and energy, I love making green smoothies - or using a high-quality and tasty greens powder like Organifi when I don't have a lot of fresh stuff on hand. Regularly rotate your greens and ingredients for the greatest nutrient variety.

For more on these nutrients, amounts, best sources and getting them in your body, read:

The 5-step Food Prep and Recipes Guide

Betty Rocker's Health, Fitness and Happiness Manifesto: 15 Rules to a Rockin' Body and Balanced Life

Betty Rocker's Meal Plans


Low-Impact Core Slider Home Workout

low impact core slider pinterest stackMove 1: Skater Slides (1:00)

  • Begin with your feet on your slides, standing upright.
  • Slide your right foot out to the side, bending your left knee. Don't overextend the right leg, stay controlled in the slide.
  • Keep your chest lifted and core engaged and slide back to start, repeating on the left.

Move 2: Lateral Slides (0:45)

  • Come into reverse plank with your feet on your sliders. You'll be holding your body up with your hands, so keep your hands stacked below your shoulders.
  • Open through your chest and squeeze your shoulder blades together slightly - it's important to maintain this throughout the duration of the move.
  • Lift the hips and keep your legs straight as you begin to slide your legs out laterally - in and out, pressing through the heels.
  • Mod: Prop your back up on the couch to do this move so you can support your wrists and focus the movement just on the lower part of your body.

Move 3: Mountain Climber Sliders (0:45)

  • Come into tall plank, hands stacked below your shoulders, legs straight, core engaged with your toes on your sliders.
  • Holding a good solid plank position, begin sliding one knee up to your chest then the other, going at a steady pace.
  • Mod: Prop your forearms and/or chest up on the couch or elevated surface to give you more support as you slide the legs. 

Move 4: Spinal Balance Sequence (0:30 each side)

  • From tabletop (on hands and knees) extend your right arm out straight in front of you and your left leg out straight behind you.
  • Hold for a moment to get your balance, then draw your right elbow and left knee in to your core to meet beneath your stomach. Extend out again and repeat. Do both sides.
  • Mod: Practice holding the balancing pose, perhaps position yourself beside a couch so you can reach a hand over if you feel unstable. Take your time working on the balance, and add the crunch in if you feel comfortable.

Move 5: Spiderman Sliders (0:45)

  • Return to a tall plank position, toes on your sliders.
  • Hold your core strong (no arching backs) and begin sliding your right knee up and out to your right elbow. Slide it back to start, then repeat with the left leg.
  • Hold your plank strong through the entire move.
  • Mod: Hold yourself up on your couch and remove the sliders. Work on lifting your right knee up to the side, then setting it down and repeating on the left with the left knee. You can also do this standing, raising knees up to the side of your body for a great oblique burn.

Move 6: Tabletop Lifts (0:45)

  • Return to reverse plank, heels on the sliders hips lifted. Hands should be stacked below your shoulders. Open your chest and squeeze your shoulder blades back together.
  • Squeeze your butt and use your core together with your legs to slide your heels in as you lift your hips up, coming into a reverse tabletop. This move uses your hamstrings, glutes and core (while bonus working your back and shoulders) to get a fantastic burn!
  • Extend one leg out and then the other for a more controlled descent back into reverse plank.
  • Mod: Balance your back on the couch or a chair and focus on the lower legs as you slide them in and out.

Move 7: Side Plank Slides (0:30 each side)

  • Position yourself on your side, with your top foot on the slider in front and your bottom foot on the mat or floor. I use something to cushion my elbow since I don't have my mat out because I'm doing sliding moves.
  • Lift up into side plank, keeping the hips square in front of you. Lift your top arm up overhead and drop your hip toward the floor. As you press the hip back up, slide your top foot in front of you and bring your arm to meet it.
  • Mod: Keep your bottom knee on the ground to provide more support and stability in this move. You can also practice the hip drop alone and work the leg slide in later, as both will really work your obliques. 

Move 8: Knee to Pike Slides

  • Come into tall plank, with your toes on your sliders. Hold your core strong, legs straight and makes sure your hands are stacked beneath your shoulders.
  • Using your lower abdominals, drive both knees in toward your chest, keeping your hips low and level as you do this.
  • Slide the legs back out straight, then use your lower abs to lift your hips up and slide your straight legs in toward your hands. Slide back out, and repeat, alternating the knees and feet.
  • Mod: Work on the knee sliders, as this will build your lower abdominal strength for the pike slides. You can work on them with your upper body up on a couch or chair to help you build strength in your upper body.

Looking forward to hearing from you today! Be sure to comment below when you do this workout, and share this post with a friend who would love it!


19

The post Low-Impact Core Slider Home Workout appeared first on Betty Rocker.

Back Attack: Home Workout for Your Back

$
0
0

Photo May 08, 3 29 18 PMWhat’s up Rockstar! So great to have you here for this awesome workout!

Now this may not be true for you, but one of the most neglected areas of the body in training is the back.

Strengthening it can have long-term benefits to your overall body balance and aesthetics, while neglecting it can leave you prone to injury and throw your joints out of balance.

Since we spend so much of our time doing activities in front of us (naturally, we don’t have eyes in the back of our heads!) the muscles that perform forward motion get used more.

Even a balanced full body training program that includes back strengthening isn’t always enough to combat the long term overuse effects of these repetitive daily tasks.

I invite you to add this, and other low impact back strengthening moves into your “heavy rotation” – that’s the parts of your body you give special focus to and never forget to train – for a lot of people that’s our abs – but I’d argue that this area is far more essential.

Just a reminder, always train within your limits, pain-free, and when in doubt or if you’ve had a previous injury (like me) be sure to seek out someone locally who can provide hands-on, personalized support to assist you in your preventative maintenance and safe training customized to YOU.


Work out with me in live weekly online home workout classes - check out Rock Your Life!

Back Attack

Move 1: Upper Back Activator - 10

  • Begin by laying on your back with your arms bent at 90 degrees.
  • Gently pull your shoulder blades back and down together to assist your shoulders in making contact with the mat or floor.
  • Keeping your shoulders, elbows and wrists touching the ground, begin lifting your arms overhead, coming as high as you can go without losing contact with either shoulder on the floor. Return to start and repeat.

Move 2: Upright Upper Back Activator - 10

  • Stand against a wall in a wall sit, pressing your lower back into the wall. You can sit as deeply as you like to add a bonus burn to your legs.
  • Position your arms against the wall the same way you did on the floor, at 90 degrees and with your shoulders touching. This may be a challenge - it's meant to help you bring awareness to imbalances in your shoulder joints and help you work to correct them.
  • Begin lifting your arms up and down, as high as you can go without losing contact with the shoulder against the wall.
  • You do not have to go super high, it is enough to work on this regularly as it will quickly have an effect.

back attack pinterestMove 3: Superman Lift -10

  • Position yourself on the mat on your stomach. Extend your arms and legs.
  • Lift up smoothly, bringing your arms and legs off the floor and lower down with control. Bringing the feet out wide will make it easier to lift as you build strength, and feet in close together adds additional challenge.
  • If this is challenging to do, try breaking the move into two parts. Practice lifting your upper body by itself, then lifting your legs while keeping your upper body isolated. Work on these individually before putting them together.

Move 4: Swimmers 10 each side

  • Stay in the same position you were in for your superman lifts. This time, lift your right arm and left leg at the same time, and alternate with your left arm and right leg.
  • Keep a slight contraction in your lower back as you "swim" and keep your gaze in front of you so your neck isn't straining or hyperextending up or down.

Move 5: Renegade Rows - 15 each side

  • Come into tall plank, arms below your shoulders back flat, belly button hugging in and up and legs straight. You may hold light dumbbells or position your hands in soft fists.
  • Stabilize your body and row your right elbow up, keeping it in close to your body. Place your hand or weight back in the starting position and repeat on the other side.
  • It's important to maintain your core stability as you do this move, and minimize the amount of movement in your hips.
  • You can also perform this from a kneeling plank position, maintaining the same strong form. 

Move 6: Superman Lift with Trap Activator - 10

  • Come back into your superman position.
  • This time, as you lift your arms, draw your elbows in to your ribcage. Focus on the squeeze between your shoulder blades and lift your legs at the same time.
  • To modify this, work on just lifting your upper body and focus on the trap activator before bringing your legs into it too. 

Move 7: Dolphin Presses -10

  • Come into a tall plank and lift your hips up high, pressing into a downward facing dog with legs straight and arms straight.
  • Lower your head toward the floor, allowing your elbows to flare out to the sides. Press back up to your starting position.
  • Keep your core engaged and hips lifting. It's natural to begin to shift forward, so pause to readjust your down dog position after a few presses.
  • You may also work on this from a kneeling position, as shown.

Move 8: Reverse Flye - 12

  • Stand, holding weighted objects. Engage your shoulders back together slightly as you hinge forward at the hips, coming to a standing 45 degree bend. Keep you core engaged.
  • Turn your pinkies up toward the ceiling slightly and keep a soft bend in your elbows. Lift your arms up and away from you, focusing on the engagement of your upper mid back muscles between your shoulder blades.
  • Bring the weights back down, palms facing each other and repeat.

Looking forward to hearing from you! Share this with a friend who would like it, and post your comments, check ins and questions below!

More articles on this subject you'll enjoy:


21

The post Back Attack: Home Workout for Your Back appeared first on Betty Rocker.

Hard Core Yoga and the 4-Step Flat Stomach Guide

$
0
0

Photo May 16, 4 22 31 PMTry out this awesome athletic yoga flow for core strength and full body stretching!

It’s a great sequence to use:

  • at the end of a workout when you’re wanting to cool down, stretch out AND work your abs, or…
  • first thing in the morning to wake your body up and stretch it out, plus burn up your abs

I do yoga about once or twice a week. Even short sessions like this can improved your flexibility and strength, improve your core stability and shred your abs!

In this focused core sequence, I’m going to take you through a simple flow that will stretch your legs, back and arms, and combine that with a targeted ab workout to sculpt your stomach muscles.

One of the most common questions I get about the stomach is how to burn off the belly fat and “see the abs.” I’ve put together a 4-Step Flat-Stomach Guide just below the video for your reference.

Let me know if you have any questions – and be sure to check in in the comments below to let me know you did today’s workout!


Links I mentioned in the video:


4 Step Flat Stomach Guide

I know it's enticing to do ab workouts every day, thinking that you'll see your abs faster, but unfortunately doing workouts that target areas where you're carrying extra body fat will not magically melt the fat off. 

We cannot "spot reduce" fat - and I would caution you from taking any supplements that promise to do so, or use "cleanses" or other quick fixes like body wraps, as they are short-term strategies some of which can harm your hormones and will not give you real, long-lasting results.

You can get the fat off - and keep it off though. Fat comes off our body systemically (which means all over our bodies), and in an order governed by our DNA.It will come off in the order it came on.

hardcore yoga blog post stack1.Do high-intensity interval training style workouts to maximize overall fat loss during your workouts.

A couple great ways to incorporate HIIT are to:

a) straight up do HIIT workouts, like these ones here on my blog.

b) incorporate intense cardio or plyo moves into your weight training circuits - like super-setting your deadlifts with jump squats or box jumps or burpees.

2. Add intensity to your workouts by adding weight, or additional resistance to your workouts. 

The second way I target body fat is by adding in resistance or strength training.

Remember that the more lean muscle you have on your body, the more calories you can burn at rest. So be sure to balance your HIIT with some strength training to see amazing results - you are not going to get bulky just by adding heavier weights to your workouts.

As you add lean muscle, your body burns more calories at rest - so you’ll be burning more fat and adding muscle. I personally take a combined approach, doing the best workout for the situation I'm in, i.e. traveling I'll use my HIIT circuits and at home I'll cycle between home workouts and weight-training.

3. Focus on training your ENTIRE core to see real ab definition.

That means workouts like today's yoga core sequence, where we targeted the abdominal wall from the inside out, and all the way around. We were working on the front, side, AND back muscles that stabilize our core and aid us in all the movements we do, as well as targeting the deep core stabilizing muscles that help us with balance, as well as spinal and pelvic alignment.

The body is super smart and if you only focus on building muscle on one side of your body (like only doing a lot of crunches or leg lifts or sit ups) you will actually only go so far in the amount of muscle you're able to develop.

This is your body's natural way of protecting you, as too much muscle on one side will put undue stress on your underlying bones and pull you out of alignment. So use the many targeted ab workouts from this blog or from my functional fitness programs to train your ENTIRE core.

nutrient balanced eating4. Eat balanced meals that contain the nutrients your body needs for support.  

One of the MOST important parts to uncovering your abdominal muscle (and really any area of your body you want to lean out) is eating a balance of nutrients.

I know we talk a lot about the macronutrients and the carbs, protein and healthy fats you need, but you also need the MICROnutrients from greens and plants for essential body, brain and hormone functions.

So many people are walking around with nutrient deficiencies that could be resolved by eating real foods and rotating their greens (read my 5-step food prep and recipes guide if you haven't yet for a 3 day plan and recipes to try out).

Taking a multivitamin isn't a magic bullet to giving your body everything it needs. Supplements aren't always absorbed as easily as the nutrients in whole foods, and unless you've had blood testing done and a specific vitamin or mineral prescribed to you, you may be dosing yourself with too much of one, and too little of another.

For so many reasons, it is essential that you take your eating just as seriously as you take your workouts.

I know we have this tendency to make ourselves stick to our exercise plan more religiously than we stick to our eating - but there is no exercise plan in the world that can out-train poor nutrition.

Do yourself a huge favor and get the education and knowledge you deserve to have about what nutrients your body needs and how to get them in your system in a variety of ways - and MAKE TIME to get that good, nourishing food in your body.

Looking forward to hearing from you today!

Share this with a friend who would also benefit from the information in this workout and blog post!

programs page thumb

The post Hard Core Yoga and the 4-Step Flat Stomach Guide appeared first on Betty Rocker.


HIIT Your Booty Ladder

$
0
0

Photo May 08, 11 51 18 AMIt’s time to HIIT that booty!

I’ve got a super fun format for our workout today! We’ll be doing 2 complimentary exercises that target the butt and legs and get our hearts pumping.

H.I.I.T stands for “high intensity interval training.”

Studies show that regular high intensity interval exercise significantly increases both aerobic and anaerobic fitness, lowers insulin resistance, and results in a number of skeletal muscle adaptations like enhanced skeletal muscle, fat oxidation, and improved glucose tolerance.

We’re going to harness all of those benefits in about 10 minutes today.

The ladder format is a favorite of  mine. You begin with one rep of each move, then two, then three and keep going (in this workout we’ll go up to ten) – so you can get the fat-burning benefits of the explosive exercise, combined with a power move to sculpt and strengthen your butt and legs.

Pace yourself with me in this workout – and pay close attention to the form and options I’ll be demonstrating at the beginning. It’s far better to use a modification as we get stronger than injuring ourselves pushing too hard!


HIIT Your Booty Ladder

HIIT Your Booty stackFormat: Perform each move for 1 rep the first round. Perform each move for 2 reps the second round. Continue all the way up to 10.

Move 1: Skinny Sumo

  • Stand with your feet wider than hip distance, toes turned out slightly (sumo stance).
  • Squat, driving back with your booty, knees tracking over toes and weight in your heels.
  • Jump and land softly in a regular squat position, feet approximately hip distance apart.
  • Alternate between jumping in and jumping out for the prescribed amount - one jump in plus one jump out together equals one total rep.
  • To Modify, begin in the wide sumo stance. Squat down, driving your butt back and as you power up, step in to a regular squat. Step out, leading with the other leg and repeat, alternating the side you step out on. 

Move 2: Elevated Bridge Lift

  • Position yourself on your back, with your feet on any elevated surface. I'm using my ottoman in this video.
  • Dig your heels down into the box or step and drive your hips up, engaging your glutes and hamstrings. Lower with control.
  • Keep your hips level - don't let one roll up or down.
  • You can also perform this on the ground, without any elevation and still get a great glute workout. Press through the heels and squeeze your glutes each time you come up.

How did you do? Check in below and let me know! Share this with a friend, and keep me posted on your progress!


13


References:

The post HIIT Your Booty Ladder appeared first on Betty Rocker.

Bikini Tabata Series 1: Full Body

$
0
0

Photo May 22, 10 49 08 PMI decided the best way to kick off summer was with a 4-part Bikini Tabata Series!

Welcome to Week 1!

Why do I LOVE Tabatas?

For one, they’re super fast. You can get a killer workout done in 4 minutes. I personally like stacking 2-3 tabatas together (we call them “endurance tabatas in Rock Your Life) and being done for the day in less than 15 minutes total.

Second, they’re wicked effective. This style of short-duration exercise has the added benefit of decreasing impact on our joints while still delivering massive results.

In an 8-week tabata style treadmill study, researchers found that their participants improved overall flexibility and anaerobic power while decreasing musculoskeletal impact on their ligaments, joints, and tendons.

  • Rock Your Life Members, this is day 3 of your workout plan this week!
  • If you’re doing the 90 day challenge, add this in as a bonus workout this week.
  • If you’re using Lioness, swap this out for one of your other HIIT workouts this week.

No matter what – leave me a comment below today’s workout and check in! Let me know how you’re doing!


Bikini Tabata Series 1: Full Body

Full Body Tabata Pinterest StackTABATA ONE

Move 1: Skater Lunges

  • Stand tall, and skip to your right, allowing your left leg to come behind you, dropping down into a curtsy lunge with your left knee lined up with your right heel.
  • Reach across your body with your left hand for your right foot.
  • Straighten and skip to the left, coming into a curtsy lunge on the opposite side.
  • Move through this rapidly with good form, being mindful not to pitch your weight forward.
  • Mod: Perform alternating reverse curtsy lunges. You can hold onto a chair back for balance and support.

Move 2: Rotating Plank

  • Begin in a tall plank position, hands stacked below your shoulders, belly button in and up - no arching back - legs straight.
  • Hold briefly, then rotate to your left, raising your right arm. You can stack or scissor your feet. Keep your hips lifting.
  • Return to center and rotate to the right, coming into a side plank on the right. Continue to rotate back and forth, maintaining a strong plank hold throughout.
  • Modification: Begin in kneeling plank, core engaged, hands stacked below shoulders. You can make soft fists with your hands to align your wrists or hold dumbbells to help keep your wrists aligned.
  • Pivot to the right, coming into a side plank with your right hand and right knee down. Hold. Return to center, and repeat on the left.

TABATA TWO

Move 1: Box Jumps

  • Position yourself behind a box, bench, step or any elevated surface. It doesn't have to be super high.
  • Spring forward and up, using your arms to propel you and land lightly on the box.
  • Fully extend your hips and then step or jump down.
  • Mod: Step onto the box, pressing through your heels. Keep your chest up and core engaged. Alternate the leading leg you step up with.

Photo Jun 02, 12 44 35 PMMove 2: Triceps Dips

  • Come into reverse tabletop facing away from your box or raised surface, with your hands behind you on the box.
  • Keep your chest open and your elbows parallel to each other as you lower down and press up.
  • Keep your knees bent, and engage between your shoulders to help keep your chest open and not put too much pressure on your shoulders.
  • Mod: Take a standing or kneeling position holding a water bottle or weight overhead. Lower and lift it toward your back, keeping your elbows in parallel to each other and your chest open. Don't let your back arch.

More Tabata Workouts for You To Try:

Awesome work!! Do you feel the burn? Check in below and let me know how you do today!


21


The post Bikini Tabata Series 1: Full Body appeared first on Betty Rocker.

Bikini Tabata Series 2: Booty and Legs

$
0
0

Photo Jun 08, 12 24 30 PMKicking off Week 2 of our Bikini Tabata series today with this lower body focused cardio smash – get ready to challenge yourself in a workout that takes less than 10 minutes!

If you haven’t tried the first workout in this series yet, you’ll love it! It’s a Full Body Tabata and you can do it with me right here.

Just to recap, tabatas are extremely effective fat-burning workouts we can do in a short amount of time (just 4 minutes per round). Scroll down below today’s workout description for the 3-Essential Components of Fat Loss.

I’ve included some strength-building resistance moves in the mix to lift and sculpt the booty and legs!

  • Rock Your Life members, this is day 3 from your workout plan this week. We’ll be building from this month’s program and rolling right into our July member’s 30-day Challenge, so stay on top of your workouts and keep following the plan I’m sending you!

If you’re not a member, I invite you to join us!

We have live home workout classes online every week where I get to see you and talk to you, I send weekly workout programming to you that includes videos to follow (new themes every month), we have a 24/7 support community where you’ll make lifelong friends, and have support on your fitness journey!

  • If you’re doing the 90 day challenge, add this in as a bonus workout this week.
  • If you’re using Lioness, swap this out for one of your other HIIT workouts this week.

Let me know how you do with today’s workout – looking forward to hearing your check-ins! Comment below!


Bikini Tabata Series 2: Booty and Legs

TABATA ONE

Legs and Booty Tabata PinterestMove 1: Jump Squats

  • Begin with your feet just slightly wider than hip distance, core engaged, chest up.
  • Squat, driving your hips back as if you were going to sit on a chair. Don't bend forward at your waist, keep your chest lifting.
  • Jump up, using your arms to propel you. Land lightly and repeat.
  • Mod: Squat back, bringing your hands down toward your feet. Squeeze your glutes and come up into a strong body squat, allowing your arms to fully extend overhead. 

Move 2: Reverse Lunge to Knee Drive

  • From a standing position, step your right foot back into a reverse lunge. Keep your chest up, and your left knee should track in line with your left toe.
  • Press through the left heel. Your right knee should be straight behind you, hovering over the floor.
  • Use your arms to coordinate your balance as you thrust your right knee forward and up to your chest. Repeat on the same leg for the full 0:20 set. You'll switch legs each set.
  • Mod: Hold onto the wall beside you as needed. Leave out the knee drive and work on stepping in and out of reverse lunge. 

TABATA TWO

Move 1: Box Jumpover Squat

  • Place any low object you can easily step onto in the center of your mat. You could pile up a few bath towels, old pillows, a couple of yoga blocks taped together, you could use a bosu ball (advanced) or a low kitchen stool.
  • Start to the right of your box, and skip step both feet to the box, then step your right foot off and to the mat, leaving your left foot on the box.
  • Come into a staggered sumo squat, shooting your butt behind you and keeping your core engaged and chest up.
  • Skip the right foot back into center up onto the box and repeat on the left.
  • Mod: Take the elevation out and skip side to side, coming into sumo squats on either side. You can also step to the right and sumo squat, then step to the left and sumo squat to take the speed element out.

Move 2: Hamstring Runners

  • For this move, you'll need something to slide on. Hardwood floors you can use towels or your socks, carpeted floors you can use magazine covers, or paper or plastic plates.
  • Come into a reverse plank, with your hands below your shoulders and your hips lifted, legs straight. Feet on your sliders.
  • Keeping your hips up, begin alternately sliding your feet in to a 90 degree angle, pressing down through your heels to really activate the hamstrings.
  • Mod: Balance your back and upper body on the side of your couch, ottoman or a chair to make it a little easier on your arms and shoulders.

3 Essential Components of Fat Loss

First, fat is NOT the devil. We need a healthy amount of body fat for normal body function.

However a lot of us have fallen victim to sedentary lifestyles and a lot of marketing hype from fad diets and food manufacturers - and are struggling to get the extra fat off around trouble areas.

To burn off body fat, we want to focus on a combination of balanced, whole-food nutrition, explosive cardio and resistance training that adds lean muscle.

workout stack1 - Explosive Cardio

Explosive cardio (like this tabata series and the programs I write) systemically targets fat burning, helping to reduce your overall body fat.

I mentioned in the 4-step flat stomach guide that while we can't "spot reduce" (a million crunches won't burn the fat off your abs), the fat WILL come off in the order it went on if we consistently approach it with these principles.

Recommendation: 2-3 times a week.

2 - Why do we want lean muscle?

Muscle supports your joints and skeletal structure. It makes us stronger and more efficient not only in our workouts, but in everyday activities too.

It burns more calories at rest than fat, effectively helping you to be fat-burning machine even when you're sitting at your desk.

When I'm not in the gym (or not using weights), I still incorporate resistance training into my workouts taking advantage of gravity, complex movements, tough balancing moves, sliders and more - all the kinds of things you can find in the workouts we do together in my classes, my online programs and workouts here on the blog.

Recommendation: 2-3 times a week.

A great way to combine resistance training and explosive cardio if you're mostly doing home workouts is to use workouts that have both types of moves written into them (circuit training style), and follow a 3-4 workout a week plan. Add in one additional day depending on your fitness level and time availability. 

nutrient balanced eating3 - Dial in Your Nutrition

Nutrition is the final - and I'd say most essential  - piece, because while your workouts can still help you get stronger, it will be harder to drop body fat if you're eating the wrong combination of nutrients.

It's very important to know that the fat that we eat from whole foods does NOT just "turn into body fat." Healthy fat from nuts, seeds, eggs, avocados, grass-fed yogurt (if you tolerate dairy well) and responsibly raised meat has important functions in our body that are essential for a healthy metabolism.

To balance your plate, focus on getting protein with every meal. Your body can't make all of the amino acids it needs for its metabolic functions and has an amino acid pool it draws from that needs consistent replenishment. Eating a variety of wholesome protein sources throughout the day is a great way to ensure you have what you need.

Include carbohydrates that come from whole-food sources your body can readily use. I recommend a combination of sprouted, fermented or soaked grains (overnight oatmeal, sprouted rice or quinoa, fermented miso) and fibrous vegetables like potatoes, sweet potatoes and squash.

Fruit is also excellent, and a quick source of energy but higher in fructose, which gets used differently than its slower-digesting carb counterparts that I mentioned first.

I recommend including your complex carbohydrates with your first meal of the day and in your meal that follows your workout.

Include healthy fats and don't eat fat free foods. The most common foods that cause fat storage are the highly processed foods, many of them labeled to make us think they're better for us with catch phrases like "fat free, sugar free, natural sugar," etc.

Beware of foods that have the fat stripped out - to make them palatable, they're often loaded with sugar and/or sodium.

Avoid foods that are "sugar free" - they usually have a lot of extra sodium and in many cases sugar substitutes and additives that aren't as easy for the body to process.

Recommendation: Last but not least, what has helped me the MOST over the years is learning about nutrition and my body so I can choose to eat mindfully.

That doesn't mean I'm eating "perfectly clean meals 24/7, 365." That means I choose these balanced nutrients most of the time, and choose to deviate from this guilt-free when the occasion calls for it.

It's a lifestyle - not a diet. Arm yourself with knowledge and empower yourself to LIVE in the body you create by choice, not by chance.


For more awesome insight into nutrition and a sample 3 Day Plan: please visit the 5-step Food Prep and Recipes Guide for a Lean, Healthy Body

Get a Meal Plan to follow that lays everything out for you so you can enjoy done-for-you menus and healthy, balanced meals and recipes.

programs page thumb

References:

Dutchen, Stephanie National Institute of General Medical Sciences What do fats do in the body? 12-2010

The post Bikini Tabata Series 2: Booty and Legs appeared first on Betty Rocker.

Bikini Tabata Series 3: Cardio Abs

$
0
0

Photo Jun 15, 4 13 31 PMWelcome to Week 3 of the Bikini Tabata Series!

This week we’re doing a super cardio core workout that combines some of my favorite ab moves in our tabata format for a fast, efficient workout!

If you are just joining this workout series, here are the other two workouts for you to try:

1-Bikini Tabata Series 1: FULL BODY

2-Bikini Tabata Series 2: BOOTY + LEGS


I'm gearing up for the Rock Your Life #SUMMERSHRED 30-Day Challenge - I host brand new challenges in our community every Spring, Summer, Fall and Winter with live classes, our full on support group and incredible home workouts to take your fitness to the next level!

If you have been wondering what it's like, this is a great time to join us! You can stay for a month, a year or for as long as you like! CLICK HERE to get more info!


Let's get right into today's workout!! Right below the form notes I included some more great info and resources for you on sculpting a strong stomach - so if that's an area of the body you're working on, be sure to scroll down and use that info!

Check in with me when you finish up today!


Bikini Tabata Series 3: Cardio Core

Format: Tabatas are formatted with 0:20 work, followed by 0:10 rest for a total of 4 minutes. Follow along with the video, or feel free to program your own workouts using this format! I use the Seconds Pro timer app to save my workouts!

Bikini Tabata Core StackTABATA ONE

Move 1: Surfer Pop Ups

  • Begin in a tall plank position. Hands are stacked below the shoulders, belly draws up to your spine, head is in neutral.
  • Drive your hips up and to the side, landing in a sumo (wide leg) squat with your chest up. It is not necessary to be as deep in your squat as me, just keep your chest lifted.
  • Place your hands back down in front of you and jump back to plank.
  • Pause if you need to to catch your breath, then jump to the opposite side, landing in a sumo squat. Be sure to keep your knees pointed the same direction as your toes. It’s okay if they go a little beyond the toes, this is a natural crouch position for the body.
  • Mod: Step out and step back to the side if you need to catch your breath. You can also switch and do the side to side knee in drivers I demo'd for you at the beginning to get off your hands and still get a great lower abdominal workout.

Move 2: Heismans

  • Stand and drive your right knee up high to the side as you bring your right elbow to meet it, performing a side crunch. Quickly perform the same movement on your left side, running your legs as you go.
  • Try to keep the knees driving up high, and a fast pace. You can slow it down and do side crunches anytime you need a break.
  • Mod: Take the run out of it to lower the impact, and alternate driving your knees to your elbows. 

TABATA TWO

Move 1: Cross Cross Jump Squat

  • Stand with feet slightly wider than hip distance apart.
  • Engage your core and shoot your booty back behind you as though you were going to sit on a chair - keeping the weight in your heels and chest up.
  • Drive your heels down to power up to jump, landing lightly on your feet.
  • As you land, drive your right knee up and across your midline, rotating your torso as you bring your left elbow to meet your knee. Repeat on the other leg, then back to the squat.
  • Mod: Take the jump out to lessen the impact, instead performing a body squat with good form. Only squat as deeply as you can comfortably go without bending forward at the waist.

Move 2: Mountain Climbers

  • Place your hands below your shoulders, keeping your chest open and core engaged. Don't arch or sag your lower back. Legs straight and strong.
  • Begin running your legs up toward your chest.
  • Mod: You can balance your upper body on an elevated surface to take some of the pressure off your wrists and hands, or stand and do running high knees.

Wanting to define those abs a little more for summer?

Awesome.

A strong core supports and stabilizes you through all the moves you make - and is a great goal.

There's a little more to getting it shredded than just doing ab workouts every day...

Shredded Stomach Guide

Abs - new towerI know it's enticing to do ab workouts every day, thinking that you'll see your abs faster, but unfortunately doing workouts that target areas where you're carrying extra body fat will not magically melt the fat off. 

We cannot "spot reduce" fat - and I would caution you from taking any supplements that promise to do so, or use "cleanses" or other quick fixes like body wraps, as they are short-term strategies some of which can harm your hormones and will not give you real, long-lasting results.

You can get the fat off - and keep it off though. Fat comes off our body systemically (which means all over our bodies), and in an order governed by our DNA.It will come off in the order it came on.


1.Do high-intensity interval training style workouts to maximize overall fat loss during your workouts.

A couple great ways to incorporate HIIT are to:

a) straight up do HIIT workouts, like these ones here on my blog.

b) incorporate intense cardio or plyo moves into your weight training circuits - like super-setting your deadlifts with jump squats or box jumps or burpees.

2. Add intensity to your workouts by adding weight, or additional resistance to your workouts. 

The second way I target body fat is by adding in resistance or strength training.

Remember that the more lean muscle you have on your body, the more calories you can burn at rest. So be sure to balance your HIIT with some strength training to see amazing results - you are not going to get bulky just by adding heavier weights to your workouts.

As you add lean muscle, your body burns more calories at rest - so you’ll be burning more fat and adding muscle. I personally take a combined approach, doing the best workout for the situation I'm in, i.e. traveling I'll use my HIIT circuits and at home I'll cycle between home workouts and weight-training.

abdominal-muscles-anatomy-1024x5853. Focus on training your ENTIRE core to see real ab definition.

That means workouts like this yoga core sequence, where we targeted the abdominal wall from the inside out, and all the way around. We were working on the front, side, AND back muscles that stabilize our core and aid us in all the movements we do, as well as targeting the deep core stabilizing muscles that help us with balance, as well as spinal and pelvic alignment.

The body is super smart and if you only focus on building muscle on one side of your body (like only doing a lot of crunches or leg lifts or sit ups) you will actually only go so far in the amount of muscle you're able to develop.

This is your body's natural way of protecting you, as too much muscle on one side will put undue stress on your underlying bones and pull you out of alignment.

So use the many targeted ab workouts from this blog or from my functional fitness programs to train your ENTIRE core.

nutrient balanced eating4. Eat balanced meals that contain the nutrients your body needs for support.  

One of the MOST important parts to uncovering your abdominal muscle (and really any area of your body you want to lean out) is eating a balance of nutrients.

I know we talk a lot about the macronutrients and the carbs, protein and healthy fats you need, but you also need the MICROnutrients from greens and plants for essential body, brain and hormone functions.

So many people are walking around with nutrient deficiencies that could be resolved by eating real foods and rotating their greens (read my 5-step food prep and recipes guide if you haven't yet for a 3 day plan and recipes to try out).

Taking a multivitamin isn't a magic bullet to giving your body everything it needs.

Supplements aren't always absorbed as easily as the nutrients in whole foods, and unless you've had blood testing done and a specific vitamin or mineral prescribed to you, you may be dosing yourself with too much of one, and too little of another.

For so many reasons, it is essential that you take your eating just as seriously as you take your workouts.

I know we have this tendency to make ourselves stick to our exercise plan more religiously than we stick to our eating - but there is no exercise plan in the world that can out-train poor nutrition.

Do yourself a huge favor and get the education and knowledge you deserve to have about what nutrients your body needs and how to get them in your system in a variety of ways - and MAKE TIME to get that good, nourishing food in your body.


Looking forward to hearing from you!

Check in and let me know how the workout is for you, and remember you are INVITED to join the Rock Your Life Community for more accountability, ongoing weekly workout programming, and SO MUCH SUPPORT!


17

The post Bikini Tabata Series 3: Cardio Abs appeared first on Betty Rocker.

Bikini Tabata Series 4: Upper Body Smash

$
0
0

Photo Jun 22, 4 39 03 PMWelcome back to our June Bikini Tabata Series!

In today’s workout, we’re going to target our back, core and arms to get an awesome fat-burning, strength building workout in less than 10 minutes.

I am loving hearing from you about how you are doing with these workouts! Be sure to check in down below in the comments area when you’re finished up today!

If you’ve been following along this month, you’ll have gotten to go around your entire body with these fast, effective Tabata workouts that can be done absolutely anywhere in 4 minute blocks!

Here are the other workouts in this series so you can take advantage of the entire collection:

Bikini Tabata 1: FULL BODY

Bikini Tabata 2: BOOTY and LEGS

Bikini Tabata 3: Cardio ABS

Enjoy the workout!


We're gearing up for our July Summer Shred 30-day Challenge in the Rock Your Life Community - so check that program out if you're looking for support, accountability and a great program to follow to really get your body moving this Summer!

Check in with me below and let me know how you do with this workout!

Bikini Tabata Series 4: Upper Body Smash

Format: Tabatas are formatted with 0:20 work, followed by 0:10 rest for a total of 4 minutes. Follow along with the video, or feel free to program your own workouts using this format! I use the Seconds Pro timer app to save my workouts!

TABATA ONE

Upper body tabataMove 1: Incline Push Up Claps

  • Position yourself against an inclined surface like a couch or chair, with your hands stacked below your wrists and core engaged.
  • Lower your chest down, and press up explosively, clapping your hands at the top. Maintain your core alignment and repeat.
  • Mods: Kneel in front of the couch or elevated surface with the same good form and work on the push up claps from a kneeling position. You can also stand and lean into a wall for less pressure on your wrists to build up your strength.

Move 2: Triceps Dip Kicks

  • Come into a reverse tabletop. Open your chest. Dip with your arms, keeping your elbows in parallel and alternate kicking your feet. Try not to let your hips dip too low, keep them up.
  • Position your hands so they're facing toward your body. You can hold light dumbbells to align your wrists if that's more comfortable for you.
  • MODS: Hold your reverse tabletop, and add in slow dips with alternating lifted legs to finish your set. Holding reverse tabletop is a great place to start with this move, and slowly add in the dips, then alternate lifting legs. The dip kicks are super advanced, so start where you are and work your way up! You can also balance against the side of a couch or chair to do them like I show you in the video.

TABATA TWO

Move 1: Burpees

  • Stand with your feet hip distance apart.
  • Bend your knees and plant your hands on the floor or mat in front of you (hands stacked directly below shoulders) and jump or step your feet back into a tall plank position.
  • Keep your core tight and do a push-up (optional) - jump your feet back to your hands and load your weight in your heels.
  • Jump up, landing softly with bent knees and repeat
  • MOD: take out the jumping by stepping back, take out the push-up, or do a body squat instead of a jump at the top

Move 2: Superman to Trap Activator

  • Position yourself on the mat on your stomach. Extend your arms and legs.
  • Lift up smoothly, bringing your elbows in to your ribcage, and legs off the floor and lower down with control. Bringing the feet out wide will make it easier to lift as you build strength, and feet in close together adds additional challenge.
  • MOD: If this is challenging to do, try breaking the move into two parts. Practice lifting your upper body by itself, then lifting your legs while keeping your upper body isolated. Work on these individually before putting them together.


21

The post Bikini Tabata Series 4: Upper Body Smash appeared first on Betty Rocker.

Viewing all 363 articles
Browse latest View live